Créer une facture de sous-traitant pour la publication de Retenue de garantie (ancien)
Contenu hérité
Cette page décrit l’ancienne expérience de facture de sous-traitant. Une expérience modernisée est également disponible.
Cette page décrit l’ancienne expérience de facture de sous-traitant. Une expérience modernisée est également disponible.
La première étape pour débloquer la retenue de garantie sur un projet consiste à créer un Facture de sous-traitantfichier . Il existe deux façons de créer une facture dans l’outil Engagements :
Un administrateur des factures crée une facture au nom d’un contact de facturation.
Un administrateur des factures peut envoyer une invitation à facturer à un contact de facturation. Ensuite, le contact de facturation suit les étapes décrites dans Soumettre une nouvelle facture en tant que contact de facturation.
Les étapes ci-dessous résument comment créer et envoyer une facture pour débloquer la retenue de garantie.
Lors de la création d’un facture pour libérer retenue de garantie, il est important de s’assurer que le facture est dans le Ébauche statut avant d’entrer dans le les montants de retenue de garantie dans l’onglet Détail de la facture.
Autorisations utilisateur requises :
Pour créer une facture ainsi que définir et débloquer la retenue de garantie avant, pendant ou après la période de facturation en cours, autorisations de niveau Admin sur le Outil Engagements.
Pour créer une facture et débloquer la retenue de garantie uniquement pendant la période de facturation en cours, vous devez disposer des autorisations de niveau « Standard » dans l’outil Engagements du projet et être le contact de facturation désigné dans le contrat. Les contacts de facturation sont automatiquement ajoutés à la liste déroulante « Privé » du contrat.
Informations complémentaires :
Pour définir le même pourcentage de retenue de garantie sur tous les postes de la facture, saisissez une valeur à appliquer à tous les postes de la facture.
Pour débloquer la retenue de garantie sur tous les postes, saisissez une valeur à appliquer à tous les postes. Le pourcentage souhaité passe ainsi de la colonne « Actuellement retenu » à la colonne « Débloqué pour cette période ».
Pour les clients en Australie  , vous pouvez également gérer la retenue à l’aide de la fonction de rétention à échelle mobile. Pour en savoir plus, voir Qu’est-ce que la rétention à échelle mobile ?
Étape 1 : créez un Ébauche Facture
Étape 2 : mettez à jour les montants de retenue de garantie débloqués sur cette période
Étape 3 : signez le PDF de la facture
Étape 4 : enregistrez et envoyez la facture
Accédez à l’outil Engagements du projet.
Sous l’onglet Contrats , recherchez le contrat dans le tableau. Ensuite, cliquez sur le lien Numéro pour l’ouvrir. 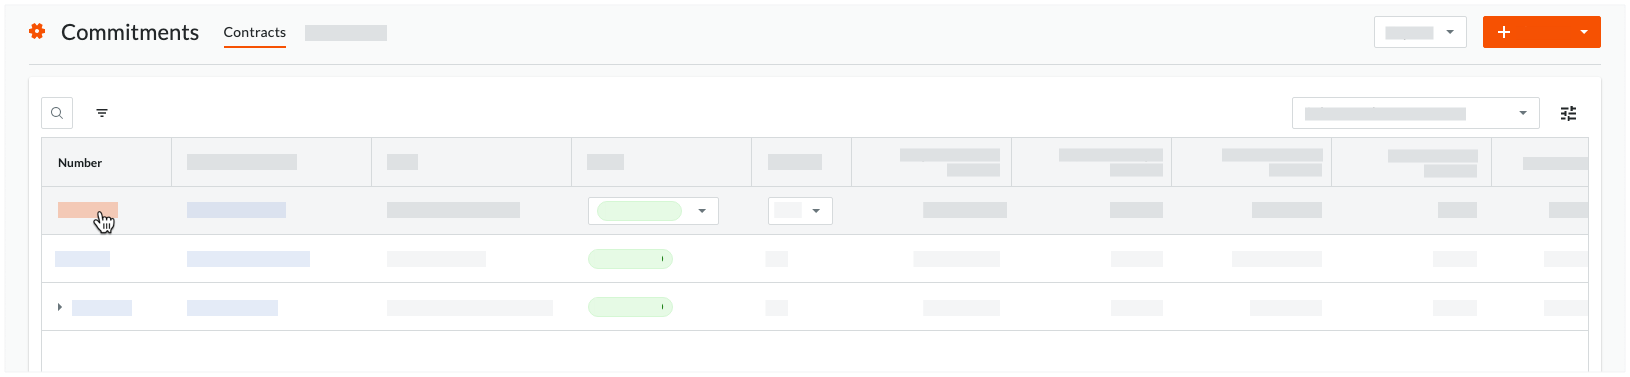
Cliquez sur le bouton Créer une facture .
Dans la page « Créer un nouveau Facture », procédez comme suit :
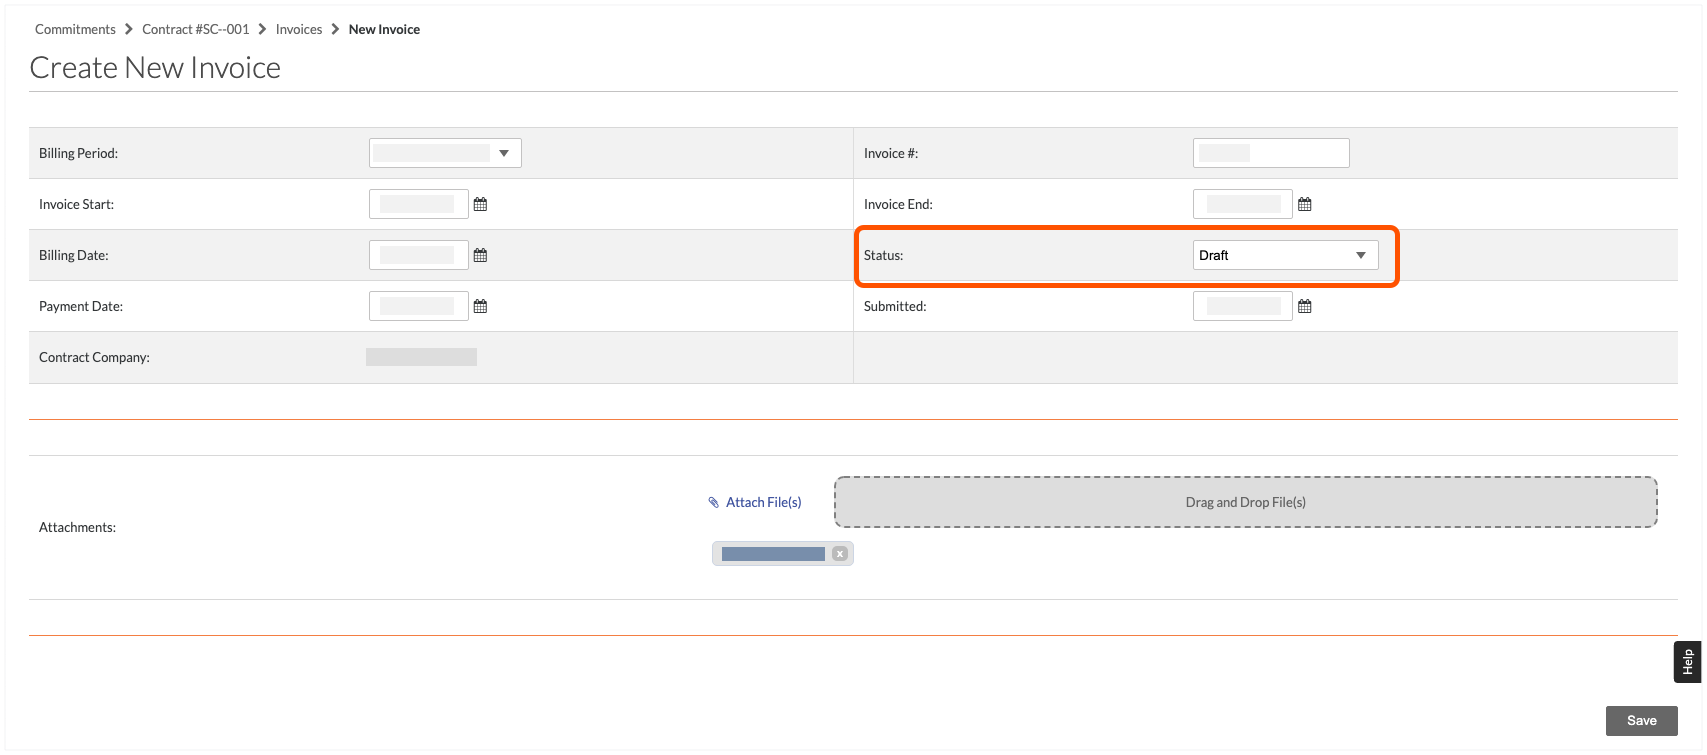
Période de facturation : Sélectionnez une période de facturation dans la liste déroulante. Par défaut, Procore affiche la période de facturation en cours si elle a été créée. Pour savoir comment créer une période de facturation, voir Créer des périodes de facturation manuelles et Créer des périodes de facturation automatiques.
# de facture : Entrez un numéro de facture dans cette case. Il s’agit d’un champ de texte de formulaire libre, vous pouvez donc saisir n’importe quelle combinaison de caractères alphanumériques de votre choix.
Début de la facture : Sélectionnez une date dans le contrôle du calendrier. Par défaut, Procore affiche la date de début définie pour la période de facturation en cours.
Fin de la facture : Sélectionnez une date dans le contrôle du calendrier. Par défaut, Procore affiche la date de fin définie pour la période de facturation en cours.
Date de facturation : Sélectionnez une date dans le contrôle du calendrier. Par défaut, Procore affiche la date de facturation définie pour la période de facturation en cours.
Statut : sélectionnez un statut dans la liste déroulante. Par par défaut, les nouvelles factures se voient attribuer le Ébauche statut.
Date de paiement : Sélectionnez une date de paiement dans le contrôle du calendrier.
Soumis : Sélectionnez une date dans le contrôle du calendrier pour représenter la date à laquelle la facture a été soumise pour paiement.
entreprise sous-traitante. Affiche l’Entreprise sous-traitante affectée au contrat associé à cette facture. Pour modifier ce champ, vous devez modifier la date dans le contrat.
Dans le champ « Pièces jointes », choisissez parmi ces options :
Joindre des fichiers. Cliquez sur ce bouton pour ajouter une ou plusieurs pièces jointes à l’aide de l’option appropriée du menu contextuel.
Faites glisser-déposer le(s) fichier(s). Utilisez une opération de glisser-déposer pour joindre un fichier local à la facture.
Cliquez sur Enregistrer.
N’oubliez pas que, lors de la création d’un facture pour libérer retenue de garantie, il est important de s’assurer que le facture est dans le Ébauche statut avant d’entrer dans le les montants de retenue de garantie dans l’onglet Détail de la facture. Si vous êtes un sous-traitant qui a été invité à soumettre une facture et que vous accédez à cette facture à partir de l’invitation, assurez-vous toujours que la facture figure dans le Ébauche statut.
Cliquez sur l’onglet Détails dans la facture de sous-traitant.
Cliquez sur Modifier.
Faites défiler jusqu’à la section Retenue de garantie sur le côté droit du tableau.
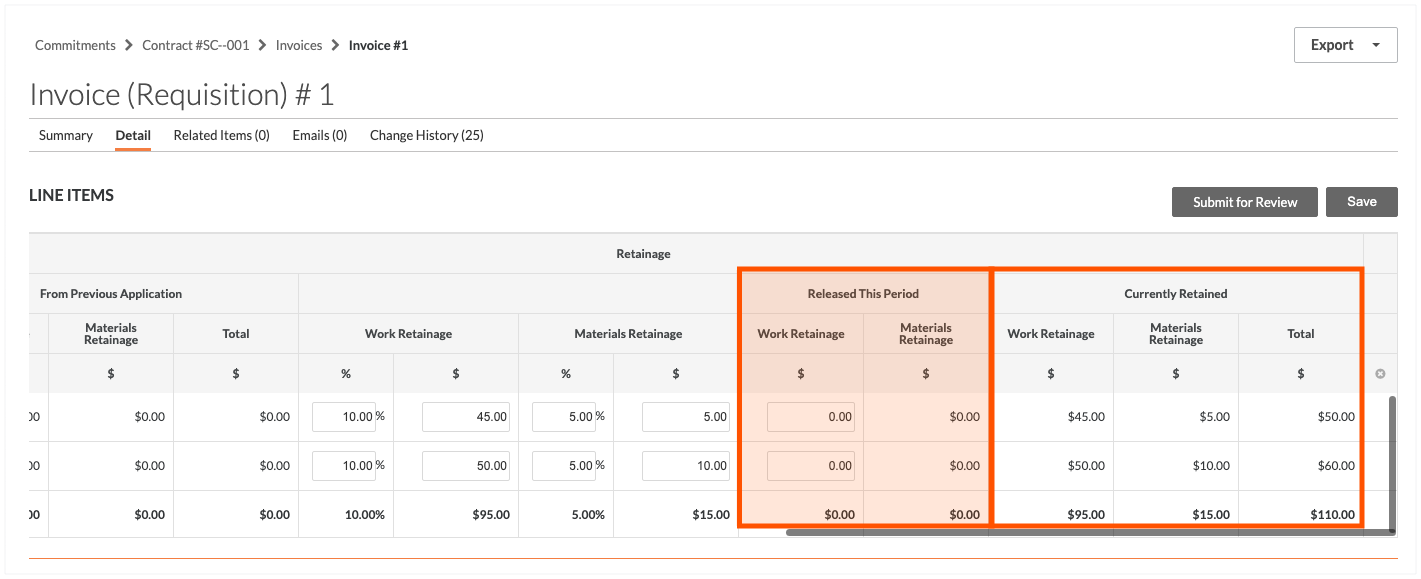
Dans la section « Débloqué sur cette période », procédez comme suit :
retenue de garantie sur les travaux. Saisissez le montant que vous souhaitez débloquer pendant cette période de facturation en utilisant le format monétaire.
Matériaux Retenue de garantie. Saisissez le montant que vous souhaitez débloquer pendant cette période de facturation en utilisant le format monétaire.
Les colonnes « retenue de garantie sur les travaux » et « Matériaux Retenue de garantie » de la section « Actuellement retenu » indiquent le montant d’argent que le sous-traitant en amont retient actuellement sur le sous-traitant en aval.
Lorsque vous saisissez des montants dans les colonnes « débloqué sur cette période », prenez avis que Procore ajuste automatiquement pour vous les valeurs qui apparaissent dans les colonnes « Actuellement retenu ».
Facultatif : Si le contrat en amont a activé le paramètre « Afficher les montants réclamés par les sous-traitants » dans l’outil Engagements, vous pourrez saisir les montants des travaux réclamés pour la période de facturation dans la colonne Montant proposé.
Le paramètre « Afficher les montants réclamés par les sous-traitants » a été conçu pour les clients Procore en Australie et en Nouvelle-Zélande. Cela permet aux entreprises de construction de créer des calendriers de paiement pour faciliter l’approbation des factures et les réclamations de travaux effectués par les sous-traitants. Pour en savoir plus, voir Créer un échéancier de paiement.
Cliquez sur le bouton Enregistrer .
Si le sous-traitant en amont vous demande de signer les informations « détaillées » de la facture :
Dans la facture, cliquez sur l’onglet Détail . 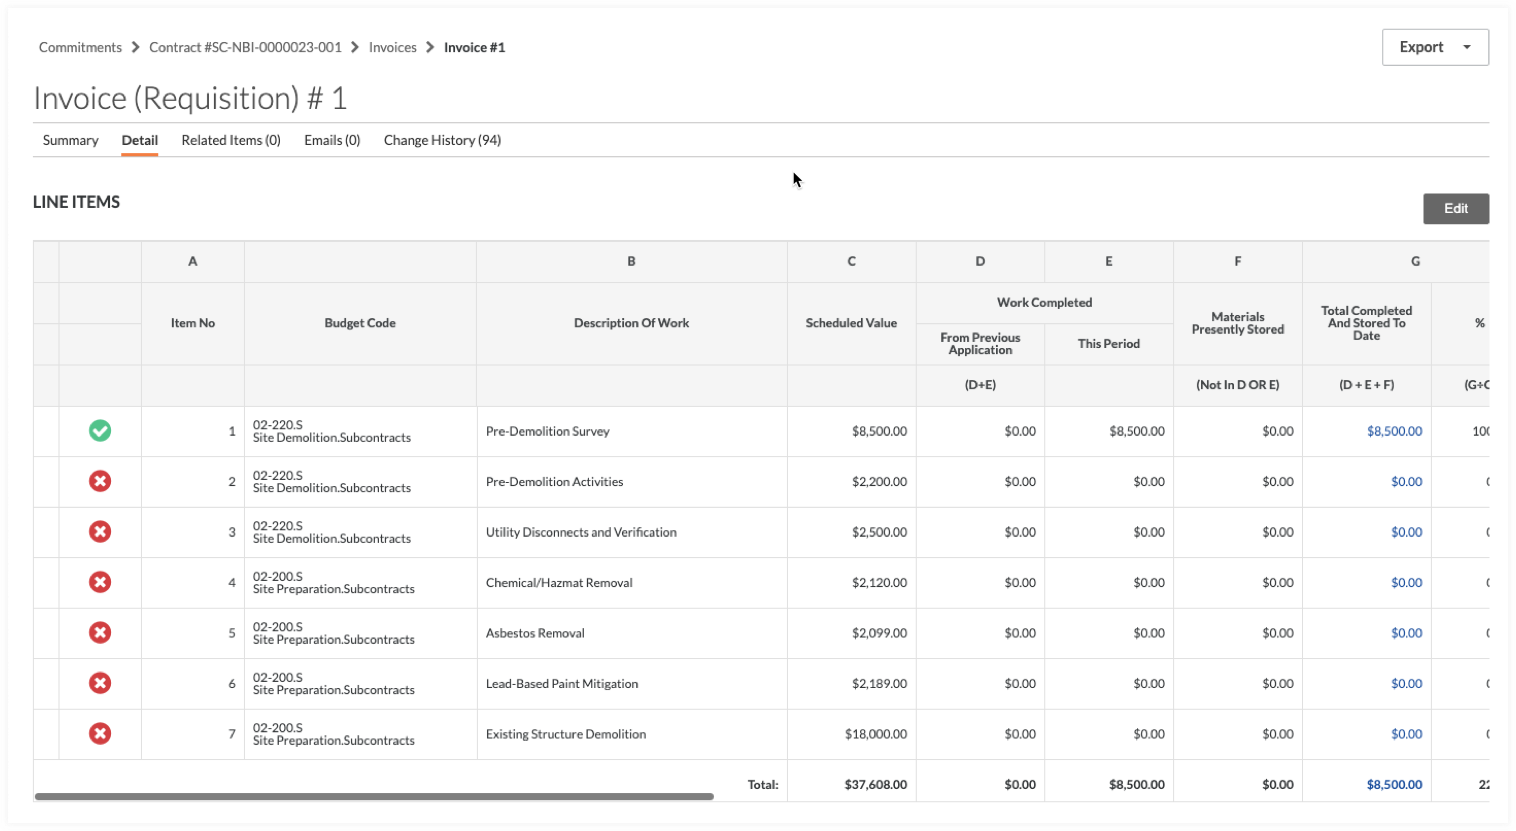
Cliquez sur Exporter et choisissez l’option PDF dans la liste déroulante.
Fournissez votre facture de sous-traitant signée à la partie contractante conformément aux conditions de votre contrat.
Facultatif. Si vous souhaitez inclure une copie de votre facture signée en pièce jointe, procédez comme suit :
Cliquez sur l’onglet Résumé .
Cliquez sur Modifier.
Faites défiler jusqu’à la superficie Pièces jointes et chargez une copie de votre facture signée. Vous pouvez également joindre des documents supplémentaires liés à votre facture, tels que des renonciations de privilège.
Cliquez sur Enregistrer pour enregistrer la facture en tant qu'« Ébauche ».
Avant d’envoyer votre facture, il est important de la réviser pour en vérifier l’exactitude et l’exhaustivité. Pour savoir comment procéder, voir Réviser les factures en tant que sous-traitant.
Une fois la facture envoyée, vous ne serez PAS en mesure d’apporter des modifications sans contacter la partie contractante pour modifier le statut de votre facture en Réviser et renvoyer.
Lorsque vous êtes prêt à envoyer votre facture, cliquez sur Soumettre pour révision. Le statut de la facture devient alors En révision.
Chargement des articles connexes...