Connectez-vous à Fabric Lakehouse à l’aide de blocs-notes Fabric
Aperçu
L’utilisation de Données Factory dans Microsoft Fabric avec Delta Sharing permet une intégration et un traitement transparents des tables Delta partagées dans le cadre de vos flux de travail analytiques avec Analytics 2.0. Delta Sharing est un protocole ouvert pour le partage sécurisé de données, permettant la collaboration entre les organisations sans dupliquer les données.
Ce guide vous guide tout au long des étapes de configuration et d’utilisation de Données Factory dans Fabric avec Delta Sharing, à l’aide de blocs-notes pour le traitement et l’exportation de données vers un Lakehouse.
Conditions préalables
Analytics 2.0 SKU
Identifiants de partage Delta :
Accès aux identifiants Delta Sharing fournis par un fournisseur de données.
Un fichier de profil de partage (config.share) contenant :
Endpoint URL (Delta Sharing Server URL ).
Jeton d’accès (Bearer token pour un accès données sécurisé).
Créez votre fichier config.yaml avec des identifiants spécifiques à l’aide du modèle ci-dessous :
{"shareCredentialsVersion": 1,"endpoint": "your-delta-sharing-server-url","bearerToken": "your-master-token"}
Environnement Microsoft Fabric :
Un compte de locataire Microsoft Fabric avec un abonnement actif.
Un espace de travail compatible avec Fabric.
Lots et scripts :
Téléchargez le fabric-lakehouse lot. L'Annuaire doit comprendre :
ds_to_lakehouse.py: code du bloc-notes.
readme.md: Directives.
Remarque : Vous pouvez télécharger le lot fichier zip à partir de l’outil niveau Entreprise Analytics (via Analytics > Mise en route > Options de connexion > Azure).
Steps
Set Up Configuration
Set Up Your Lakehouse
Validation
Set Up Configuration
Create the config.yaml file and define the configuration in the following structure:
source_config:
config_path: path/to/your/delta-sharing-credentials-file.share
tables: # Optional - Leave empty to process all tables
- table_name1
- table_name2
target_config:
lakehouse_path: path/to/your/fabric/lakehouse/Tables/ # Path to the Fabric Lakehouse
Set Up Your Lakehouse
Open your Microsoft Fabric workspace.
Navigate to your Lakehouse and click Open Notebook, then New Notebook.
If you don’t know the value in config.yaml#lakehouse_path, you can copy it from the screen.
Click the the ellipsis on Files, and select Copy ABFS path:
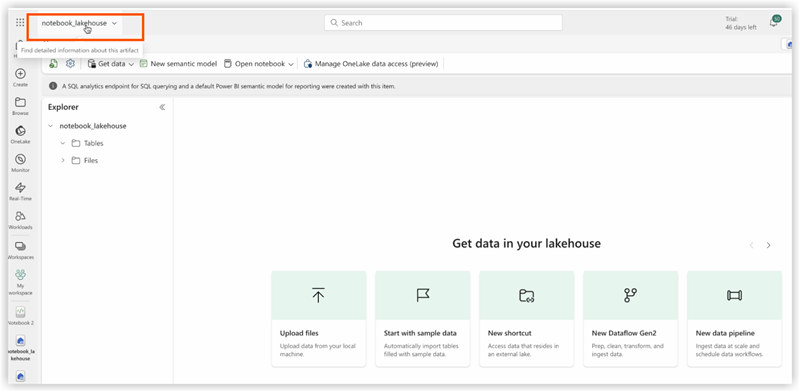
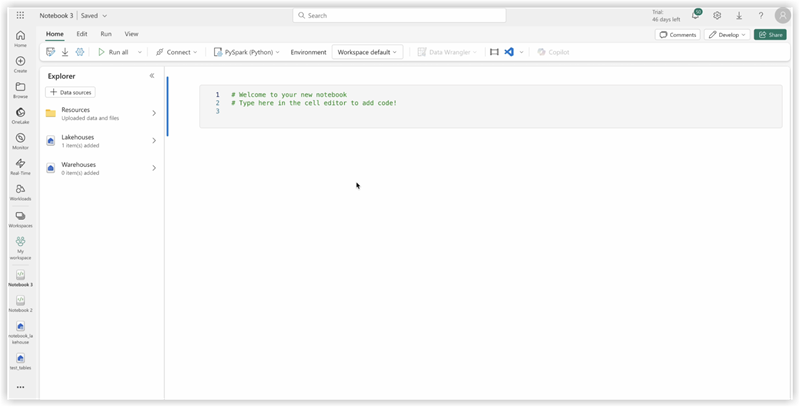
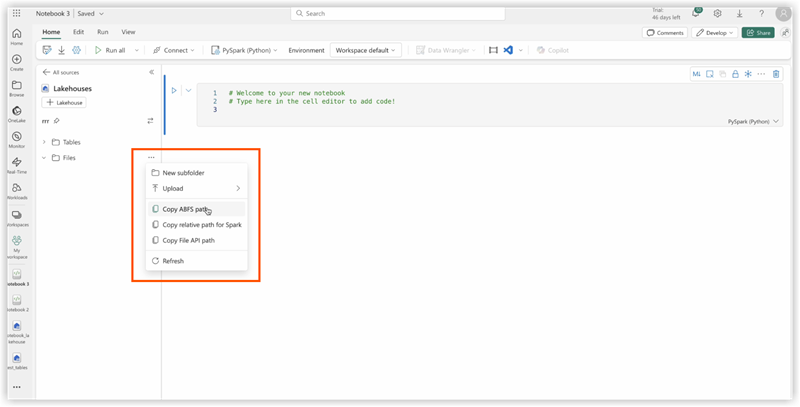
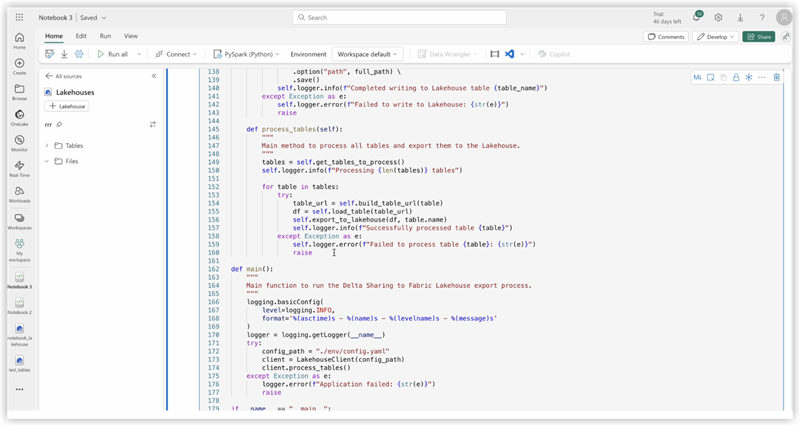
3. Copy code of ds_to_lakehouse.py and paste into notebook window (Pyspark Python):
The next step is to upload your own config.yaml and config.share into the Resources folder of the Lakehouse. You can create your own directory or use a builtin directory (already created for resources by Lakehouse):
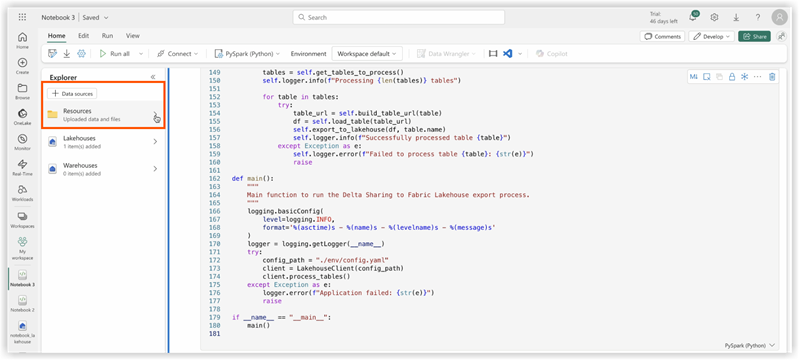
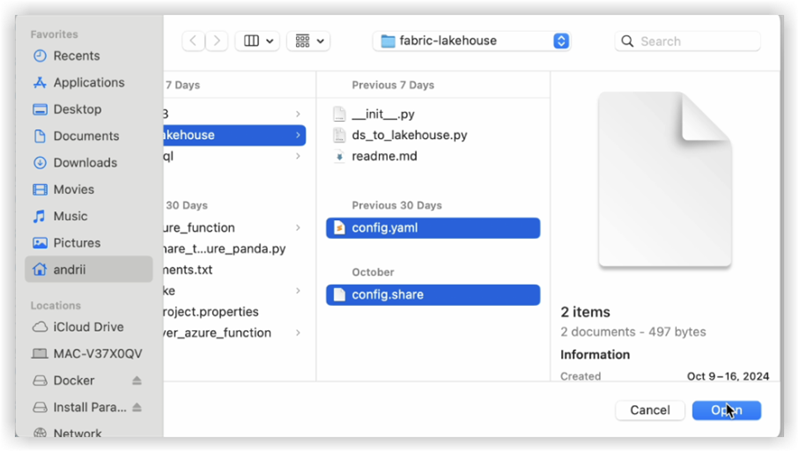
The example below shows a standard builtin directory for a config.yaml file .
Note: Make sure you upload both files on the same level and for the property config_path:<<<
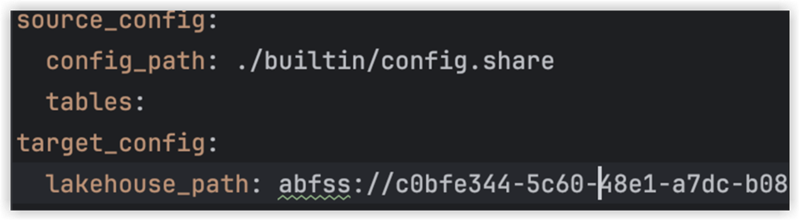
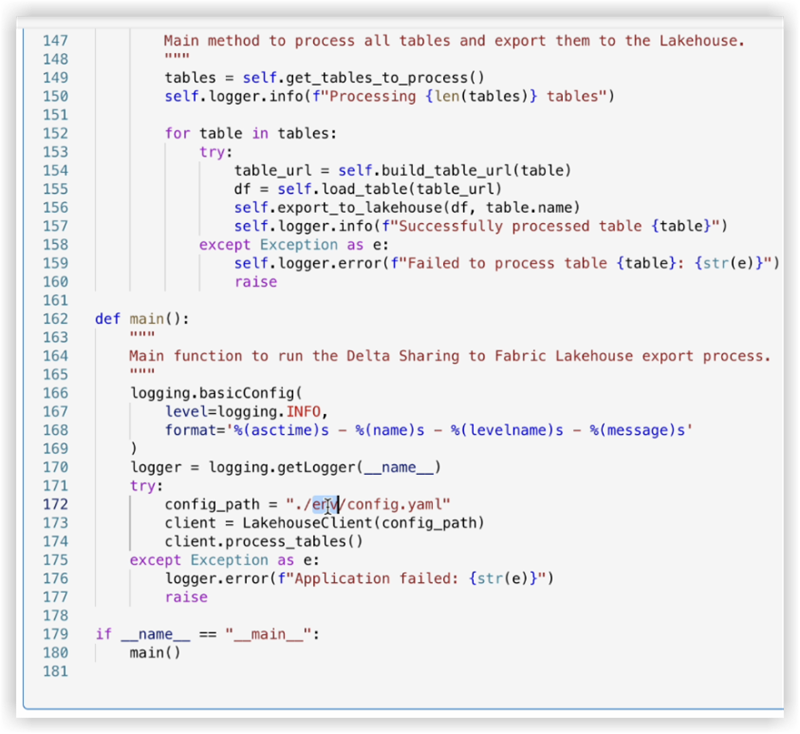
4. Check the code of the notebook, lines 170-175.
The example below shows the necessary line changes:
config_path = "./env/config.yaml"
to
config_path = "./builtin/config.yaml"
Since the files are in a builtin folder and not in a custom env, make sure to monitor your own structure of the files. You can upload them into different folders, but in such cases, update the code of the notebook to find config.yaml file properly.
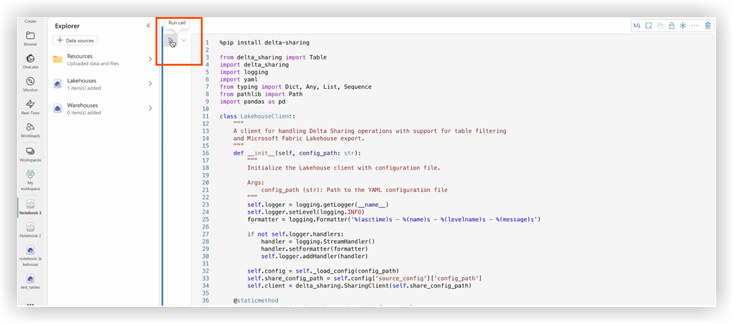
5. Click Run cell:
Validation
Once the job completes, verify the data has been copied successfully to your Lakehouse.
Check the specified tables and ensure the data matches the shared Delta tables.
Wait until the job is finished, it should copy all the data.