Create a Prime PCO from a Change Event
Background
If your company has configured your project to use a two (2) tier change order structure, the change event process requires you to create a potential change order. Then, you will create the PCCO from the Prime Contract tool. When you create a PCO, the Schedule of Values (SOV) will populate with the Latest Price values.
Things to Consider
Required User Permissions:
'Standard' level permissions or higher on the project's Change Events tool.
AND'Standard' level permissions on the project's Prime Contracts tool and the 'Allow Standard Level Users to Create PCOs' configuration setting must be enabled on the Prime Contracts tool. See Configure Settings: Prime Contracts.
Additional Information:
Depending on the change order tier configuration setting configured for the Prime Contracts tool, potential change orders can be transitioned into one (1) of the following items:* For two (2) tier change orders, a prime contract change order.* For three (3) tier change orders, a change order request.* To learn more see, What are the different change order tier settings in Project Financials?
Prerequisites
The Change Events tool must be turned ON on the project. See Add and Remove Project Tools.
The two (2) tier change order configuration settings must be turned ON the Prime Contracts tool. See Configure the Number of Prime Contract Change Order Tiers.
The project's prime contract must be in the 'Approved' status. See Approve a Prime Contract.
Steps
Navigate to the project's Change Events tool.
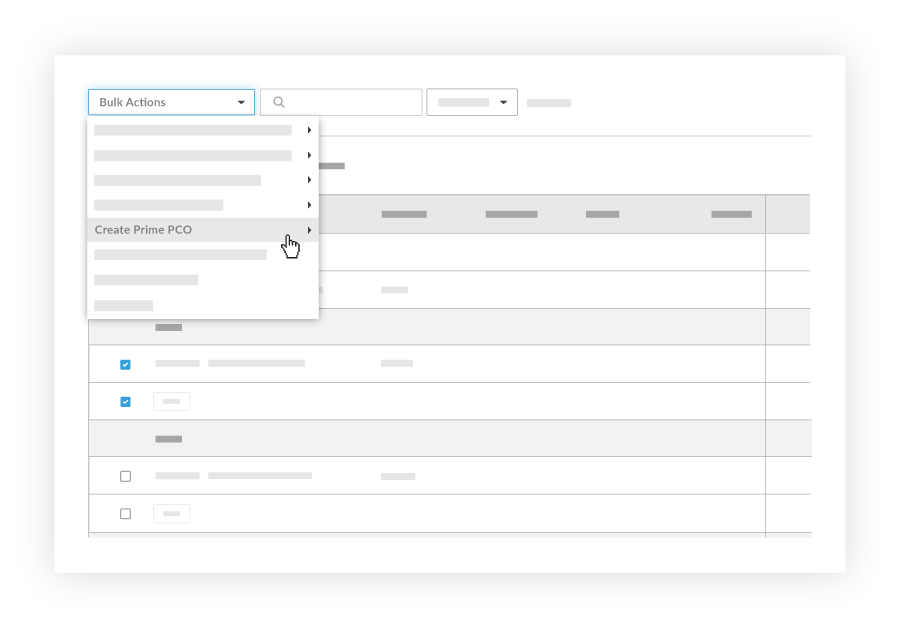
In the table, mark the checkboxes for one (1) or more change event line item(s) to include in the new potential change order.
Note
Procore creates the potential change order's Schedule of Values (SOV) using the selected change event line item(s).
Click the Bulk Actions menu and choose the Create Prime PCO option. Then choose the appropriate contract option from the sub menu.
In the 'New Potential Change Order' page, complete the following data entry:
Sign with DocuSign®If you have enabled the Procore + DocuSign® integration (see Enable or Disable the DocuSign® Integration on a Procore Project), a checkmark appears in this box by default. If you do NOT want to collect signatures with DocuSign®, remove the mark.
Tip
How do you collect signatures with DocuSign? After the data entry for the item is complete, Procore recommends changing the item's status to 'Out for Signature' before clicking the Complete with DocuSign button to launch the DocuSign® application. If you have not previously signed in, you will be prompted to Log In to DocuSign®. Once you are signed in, you can prepare the DocuSign_®_ envelope for signatures. After the signature process is complete, Procore automatically changes the status of the item to 'Approved' and marks the item as 'Executed'. To learn more, see DocuSign®.