Edit a Timecard Entry in the Company Level Timesheets Tool
Things to Consider
When you edit a signed timesheet, the employee must sign it again.
Zero hour entries are supported to enter time off and per diem.
To edit an 'Approved' timecard entry, first change its status to 'Pending' or 'Reviewed'.
Timecard entries can only be marked as 'Completed' in the Company level Timesheets tool.
After a timecard entry has been marked as completed, edits are no longer permitted.
Steps
Edit a Single Timecard Entry
Bulk Edit Timecard Entries
Edit a Single Timecard Entry
Navigate to the company's Timesheets tool.
Locate the timecard entry to edit.
Entries save automatically.
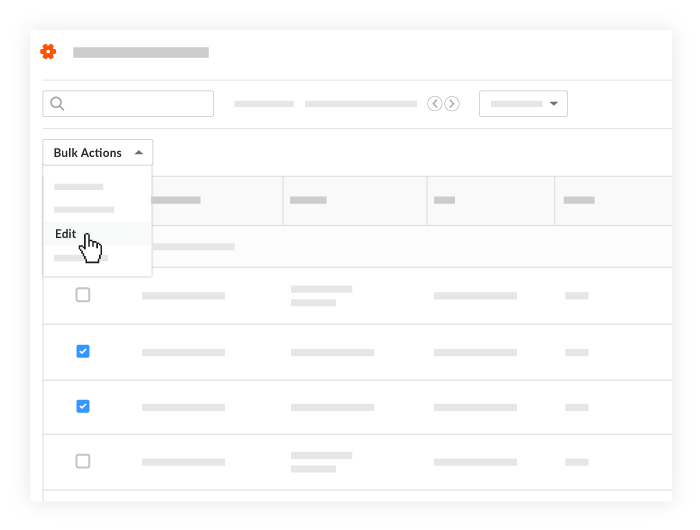
Bulk Edit Timecard Entries
Navigate to the company's Timesheets tool.
Select the time period by clicking the arrows next to the Work Week label.
Mark the checkbox next to time entries from the same project.
Click Bulk Actions and choose the Edit option.
Start Time. Select the desired start time for the shift.
Stop Time. Select the desired stop time for the shift.
Total Time. Enter the total time your company's Timesheets tool is configured for entry of hours worked.
Time Type. Select the time type.
Click Apply Changes.
Click Save Changes.