Create Disbursements
Navigate to the Company level Payments tool.
Click the Subcontractor Invoices tab.
Note: Use the Search, Filter, and Group By options to narrow the list. See Manage Rows & Columns on the Subcontractor Invoices Tab and Search for and Apply Filters on the Subcontractor Invoices Tab.Select one (1) or more 'Unpaid' invoice(s) by marking the checkbox(es) and click Add to Disbursement.
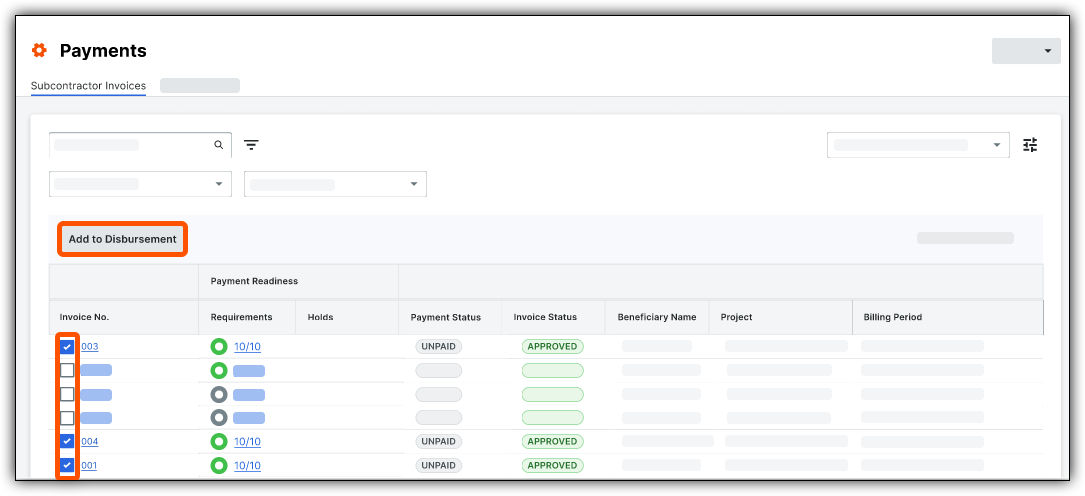
Click to view full-sized image
If one or more ‘Draft’ Disbursements are available to add the selected invoice(s) to, choose Add to Disbursement or Create New from the dropdown menu.

If there are no available ‘Draft’ Disbursements to add the selected invoice(s) to, click Create New.
On the New Disbursement page, complete the setup details under Details:

Click to view full-sized image
Disbursement Name: Enter a unique name to help identify the disbursement.
Business Entity: If applicable, select the appropriate Business Entity from the dropdown list. (This list only appears for companies operating with more than one business entity).
Funding Account: Select your company's Funding Account from the dropdown list. If only one funding account is set up for the selected business entity, it will be pre-selected.
Aggregate Disbursement Amount: Review the calculated total disbursement amount across all included invoices.
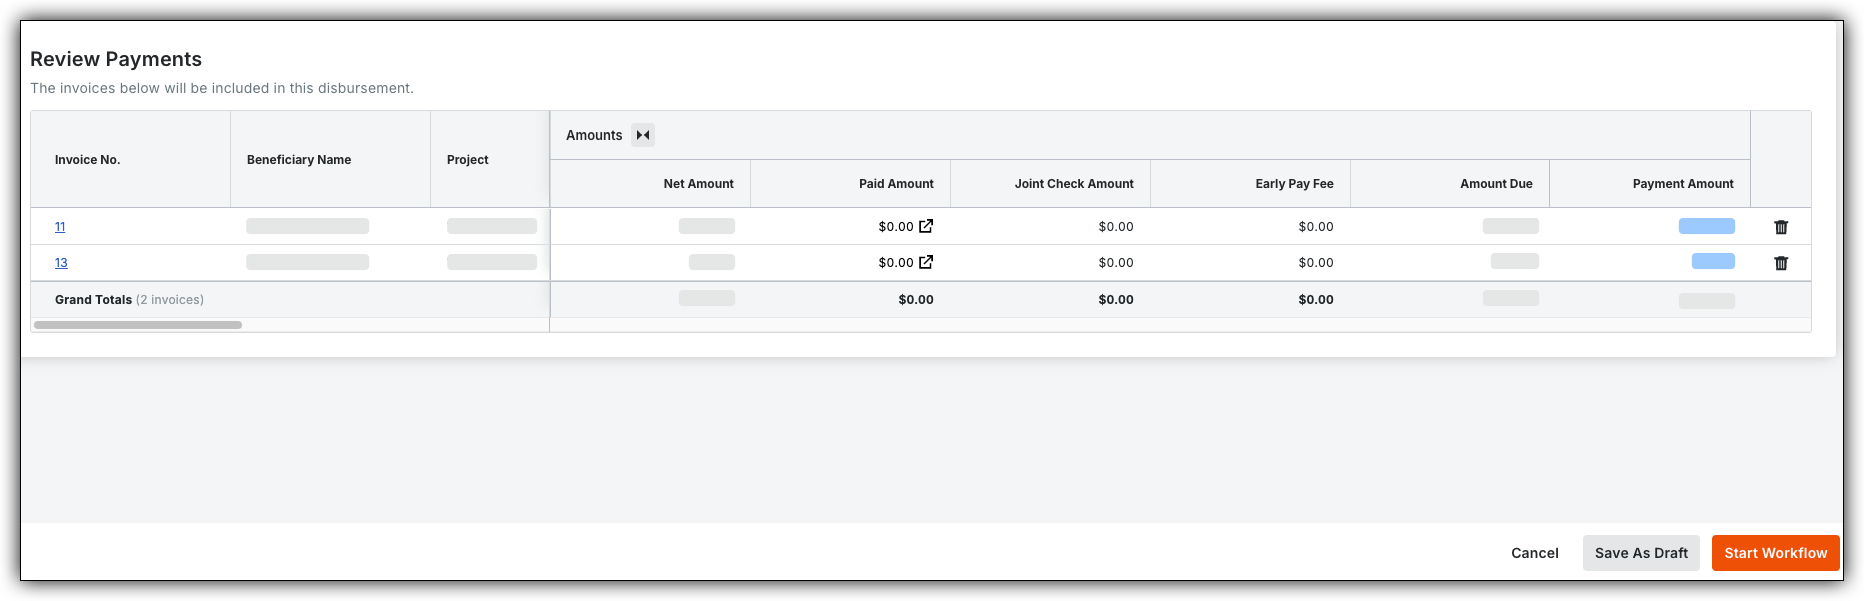
In the Review Payments section on the same page, verify the list of included invoices:
Click to view full-sized image
To remove an invoice from the disbursement, click the Trash Can icon next to the line item.
Use the carats in the Amounts column header to expand/collapse column groups to display Net Amount, Paid Amount, Joint Check Amount, Early Pay Fee, Amount Due, and Payment Amount for each invoice.
Select an action at the bottom of the page to proceed:
Note: The actions available will depend on whether your company uses a custom payments workflow.Save as Draft: Saves the disbursement in 'Draft' status for easy identification and future editing.
Start Workflow: Continues to the payments workflow review and authorization steps (visible if your company uses a custom payments workflow).
Go to Authorize: Proceeds directly to authorize the disbursement (visible if your company does not use a custom workflow).


