Publish a Model to Procore with the Navisworks® Plugin

Background

Coordinated models are often stuck in the office, accessible only to BIM teams on desktop computers. Publishing models to a Procore project connects office staff with field personnel. This gives field teams mobile access to the models, helping them reduce installation errors and boost productivity.

Things to Consider

  • Required User Permissions:

    • You need both:

      • 'Admin' permissions to the Models tool.

      • 'Read Only' or higher permissions to the Drawings tool to add and map 2D drawings to the model.

  • Additional Information:

    • Model files uploaded with the Procore VDC Plugin cannot exceed 5GB.

    • You can only publish NWD or NWF files from Navisworks®.

    • Use Section Boxes in Navisworks® to publish specific areas or views of your model. See Add a Section Box to a Model. Section Planes are not supported and can't be published to Procore.

Prerequisites

Steps

Follow the steps below to publish a model to Procore.

Step 1: Launch the Procore Plugin in Navisworks®

  1. In Navisworks®, click the Procore tab to open the plugin ribbon.

  2. Click Publish to open the Models window.

Step 2: Select the Publish Action

In the Models window, choose one of the following options:

  • To publish a new model, click New Model.

  • To publish a new version of an existing model, hover over the model in the list and click Publish Version.

Step 3: Enter Model Information

Enter information about the model as follows:

  1. Choose the appropriate option:

    • For a new model, enter the name that will be displayed in Procore in the Model Name field.

    • For an existing model, keep the existing name.

  2. Select the Status of the model from the drop-down list:

    • Coordination. For reference only. Not approved for construction.

    • Construction. Fully coordinated and approved for field installation and layout.

    • As-Built. Updated to reflect final, field-verified conditions.

  3. Automatic Revisions:

    • Select the box to automatically publish a new revision when a new version is updated.

  4. Select an option to set your 2D mapping preference:

    • Map Drawings (Recommended). Click Next

    • Publish model without mapping drawings. Click Save Changes.

Step 4: Configure Viewpoints

Set the Home Viewpoint

The Home Viewpoint is the model's default starting view and thumbnail image. For best results and easy navigation, choose a clear, general overview of the project.

  1. Set the initial viewpoint:

    1. In the viewer, navigate the model to your desired starting position.

    2. Click Add.

    3. Click Save to confirm.

  2. Optional: Update an existing viewpoint:

    1. Navigate the model to the new position.

    2. Click Edit.

    3. Click Save to apply the changes.

Add Saved Navisworks® Views (Optional)

You can upload specific viewpoints to make them available in Procore.

  1. Add a saved view:

    1. Click Add.

    2. Mark the checkbox next to each view you want to upload.

    3. Click Add to confirm your selections.

  2. Optional: Remove a saved view:

    1. Click the delete (x) icon next to the viewpoint.

Step 5: Add a 2D Sheet

  1. On the Map Drawings to Model screen, make a selection from the dropdown menu for each of the following required fields:

    • Level. Select a location level from the drop-down menu.

    • Drawing Area. Select a drawing area from the drop-down menu.

    • Drawings. Select the relevant drawing(s).

  2. Click Next.

    • Now, you must map the sheet(s) to the model.

Step 6: Map the 2D Sheet to the Model

This step aligns the 2D drawing with the 3D model by asking you to select two common reference points on each.

  1. Select reference points on the 3D model:

    1. Click Map Model to begin.

    2. Select two reference points on the 3D model. The points will be labeled 'A' and 'B'.

    3. To clear your selected points, click Reset All.

    4. When you are satisfied with your points, click Save.

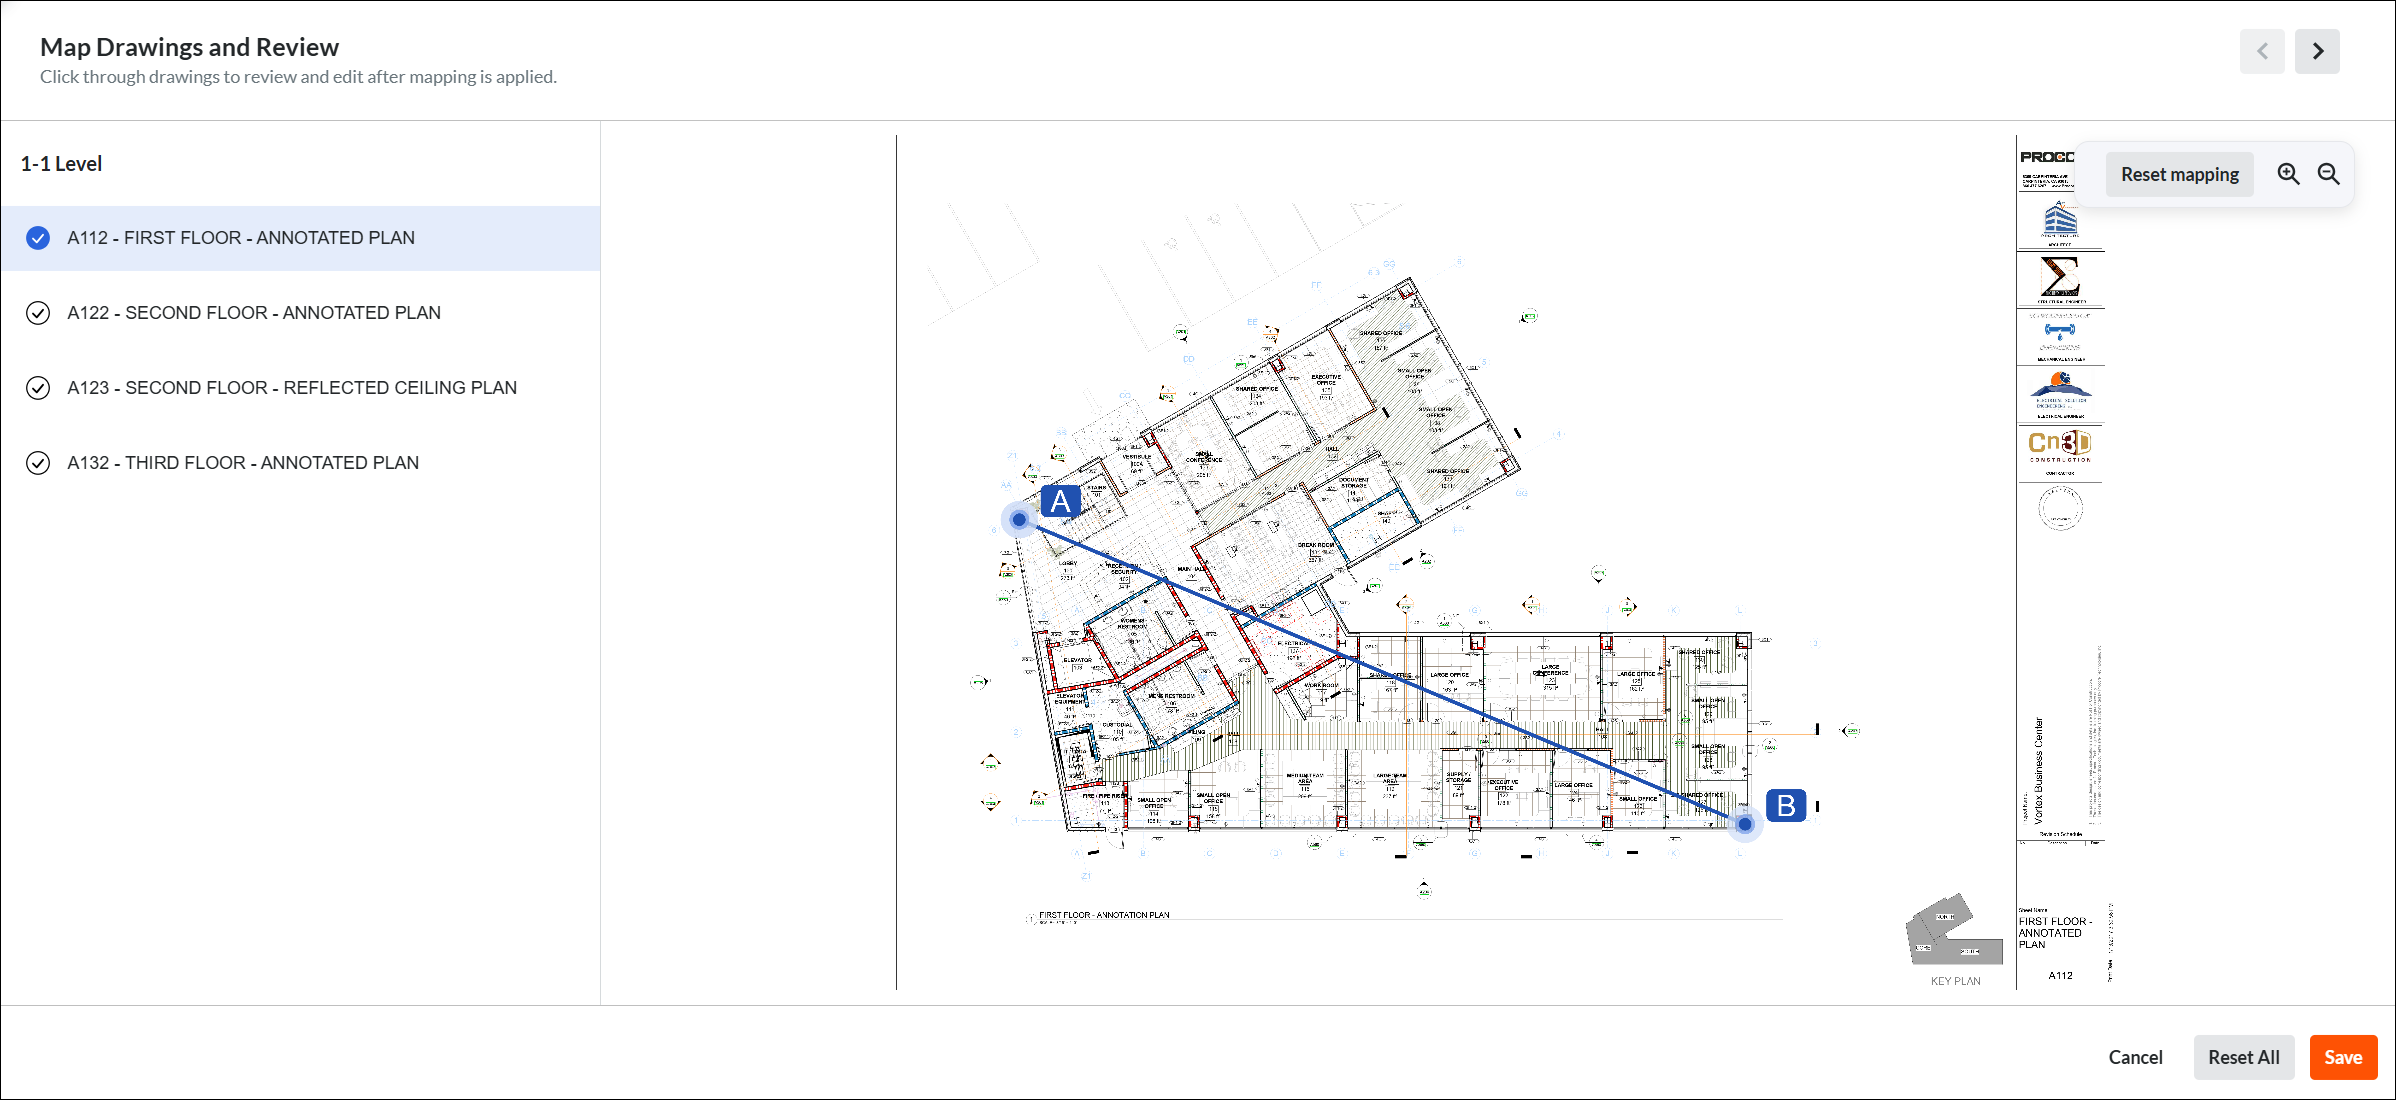
  2. Select matching points on the 2D drawing(s):

    1. Click Map Drawings to begin selecting points on the drawing(s).

    2. Select the same two reference points on the 2D drawing that correspond to points 'A' and 'B' from the model.

      • The rest of the selected drawings will be automatically mapped
        Note: Reference points are saved automatically, but reviewing the drawing turns the checkmark blue.

        map-drawings-model-review-screenshot

    3. To clear your selected points, click Reset All.

    4. To clear the selected points on one drawing, select the drawing and click Reset Mapping.

    5. Click Save to confirm the points.

  3. Click Done Mapping when finished.

  4. Click Save Changes.

Step 5: Publish the Model

Before finalizing the model, decide whether to process it using Procore's cloud servers (recommended) or your local computer.

 Important

Use Section Boxes in Navisworks® to publish specific areas or views of your model. See Add a Section Box to a Model. Section Planes are not supported and can't be published to Procore.

  1. Choose your publishing method:

    1. Cloud Publishing (Default & Recommended)

      • How: Leave the Publish Locally checkbox cleared.

      • Description: This is the fastest method. Procore's servers do the heavy lifting, which frees up your computer. You can monitor the progress on the Uploads tab in the Procore BIM plugin.

    2. Local Publishing

      • How: Mark the Publish Locally checkbox.

      • Description: This option is significantly slower. Procore recommends using it when publishing a locked model file or when troubleshooting issues with the Navisworks® Appearance Profiler.

  2. Finalize and view:

    1. When ready, click Publish.

    2. After the model has successfully processed, a confirmation message will appear. Click Done.

    3. View your model in the Models tool on the Procore web or mobile app. See View a Model (Web), (iOS), or (Android).

See Also

Loading related articles...