Create a Submittal
Background
In the construction industry, a submittal consists of information provided by subcontractors to the general contractor and design team for approval of equipment and materials before they are fabricated and delivered to a project. Submittals can include shop drawings, equipment cut sheets, or material samples. These allow architects and engineers to verify that the correct products will be installed in compliance with design and contract documents.
Using the Submittals tool helps project teams streamline the review process. Typically, a submittal manager—often a project manager or engineer—oversees the submittal throughout its lifecycle. While the person who creates the submittal is assigned as the manager by default, this role can be reassigned to ensure continuity if project team members change. Once the manager creates the submittal and the subcontractor provides documentation, it is sent to the design team for official review and approval.
Things to Consider
Additional Information:
Alternate methods for adding submittals to a project include:
Importing your submittals into the Project level Submittals tool. See Send a Completed Submittals Import Template to Procore.
Generating a submittal log from the Project level Specifications tool. See Submittal Builder: Generate Submittals from Specifications.
Steps
Navigate to the project's Submittals tool.
Click + Create and choose Submittal from the dropdown menu.
Create a new submittal as follows:
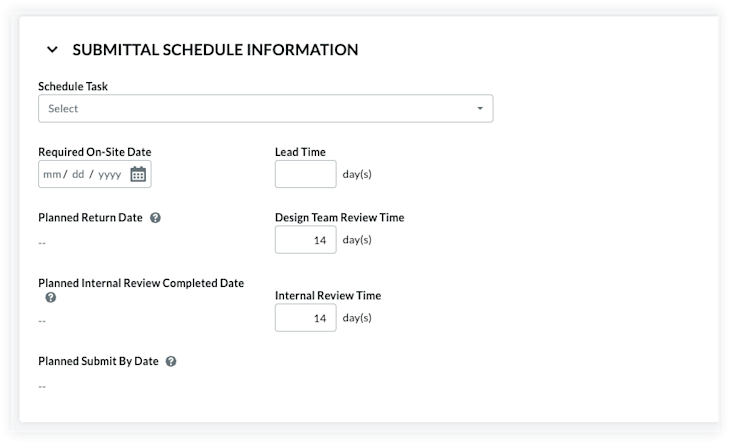
Update the Delivery Information
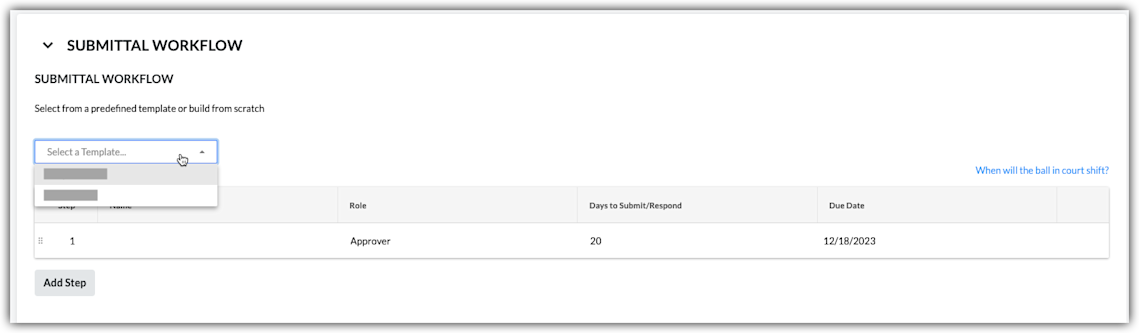
Apply a Submittal Workflow Template
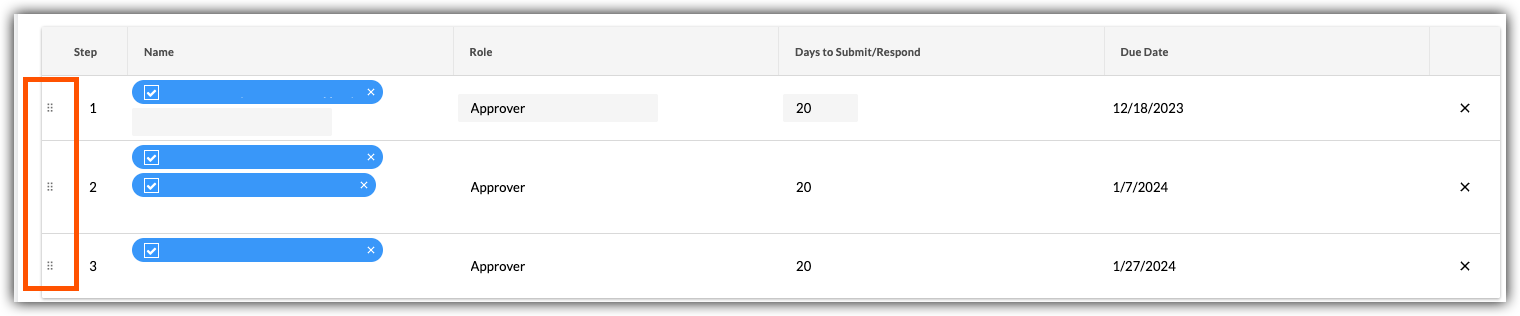
Add Users to the Submittal Workflow
Add General Information
Note
Users with Standard permission to the Submittals tool are limited to viewing the following fields when creating a new Submittal:
Title, Spec Section, Number & Revision, Submittal Type, Responsible Contractor, Received From, Final Due Date, Location, Linked Drawings, Distribution List, Ball in Court, Private, Description, Attachments
Complete the data entry in the General tab as follows:
Title. The descriptive name that best summarizes the information in the submittal.
Specifications. Denotes the corresponding section from the project's specifications book. See Where do the selections in the 'Specification Sections' drop-down list in the Submittals tool come from?
Number & Revision. The submittal number and its revision number. See How are submittals numbered in Procore?
Submittal Package. The submittal package that contains the submittal. In Procore, adding submittals to a package is optional. The decision to add submittals to a submittal package is based on your project's requirements, which is determined by your company's or project's management team. For instructions, see Create a Submittal Package.
Status. The current status of the submittal. Only a user with 'Admin' level permission to the Submittals tool can change a submittal's status. See What are the default submittal statuses in Procore? and What is a 'Draft' Submittal?
Notes: If a submittal is Open and has no workflow, the Ball in Court is the Submittal Manager and the item should show in their My Open Items tool.If a submittal is Open and does have a workflow, the current workflow step assignee has the Ball in Court. Once the workflow is complete, BIC returns to the Submittal Manager.If a submittal is Closed, the Ball in Court is cleared.
Responsible Contractor. The company name of the contractor/subcontractor that is responsible for completing the work specified on the submittal.
Received From. The contact for the responsible contractor who provided the submittal information to the project team.
Submit By. Select the date by which a contractor/subcontractor must submit all relevant documentation (i.e., documents, drawings, manuals, plans, and so on) for the submittal to the project's design team for review.
Issue Date. The date the contractor/subcontractor submitted the submittal items (i.e., documents, plans, and so on) to your project team for the review process.
Received Date. The date that the submittal information was received from the contractor/subcontractor responsible for the performing work associated with the submittal.
Final Due Date. The due date by which all approvers on the submittal workflow must submit a response.
Notes: When the 'Final Due Date' occurs, the system sends an automated email notification to notify users that the submittal is overdue. If your system is configured to use sequential approval, the notification goes to the Submittal Manager and the Ball in Court person on the approval workflow. If your system is configured to use parallel approval, the notification goes to the Submittal Manager and members of the approval workflow).
Lead Time. The expected number of calendar days that will be required for the material/services for the submittal to arrive.
Required On-Site Date. The date by which materials related to the work detailed on the submittal must be delivered and available at the construction site.
Cost Code. The cost code for the submittal. Cost codes are managed in the 'Cost Code' segment in Procore's Work Breakdown Structure.
Submittal Manager. The name of the submittal manager. This is the person who is responsible for overseeing the submittal throughout its lifecycle in Procore. Each submittal can have a different submittal manager or your project team can configure a 'Default Submittal Manager' for all of your submittals. See What is the 'Submittal Manager' role?
Type. The information type associated with the submittal. The default type selections in Procore include: Document, Pay Request, Payroll, Plans, Prints, Product Information, Product Manual, Sample, Shop Drawing, Specification, and Other. See Create Custom Submittal Types.
Private. Indicates privacy settings for the submittal. When a submittal is marked 'Private', it is only visible to users with 'Admin' level permissions on the Submittals tool, users in the Submittal Workflow, and members of the submittal's Distribution List. Users with the 'View Private Submittals Associated to Users within Same Company' granular permission enabled on their permissions template can also view a submittal marked 'Private' if another user in their company is associated with the submittal. See Mark a Submittal as Private.
Location. The location at the job site for the submittal. This can be an existing location from the Location list or a tiered location. See Add Tiered Locations to a Project.
Linked Drawings. Renderings stored in the project's Drawings tool that are linked to the submittal. See Link Related Items on a Drawing.
Description. Informative details, notes, and/or actions that describe the submittal.
Attachments. Attach any relevant files. You have these options:
Click Attach File(s) and then choose the appropriate option from the shortcut menu that appears.
ORUse a drag-and-drop operation to move files from your computer into the grey Drag and Drop File(s) box.
Distribution List. The people who will receive email notifications from Procore as the submittal progresses through the submittal workflow. If your project team has created any distribution lists in the Project Directory, you can select those lists here. See Add a Distribution Group to the Procore Directory).