Configure IdP-Initiated SSO for Procore with OneLogin

 Important: Before Starting SSO Configuration

Contact your Procore point of contact or Procore Support if your organization uses:

  • Portfolio Financials & Capital Planning. This solution requires additional configuration to complete authentication setup.

  • Procore Pay. This solution requires Multi-Factor Authentication (MFA) for Payments alongside SSO.

Background

If your company manages your users with OneLogin, you can leverage its SSO capabilities. This gives your end users the ability to authenticate their identify for the Procore application using their OneLogin account. With this SSO integration, you can:

  • Leverage OneLogin for SSO access to Procore.

  • Simplify your entire organization's password management process.

  • Avoid problematic user password management.

Things to Consider

  • Required Permissions:

    • Super User or Account Owner for OneLogin

    • 'Admin' level permission on the Company level Admin tool.

  • Supported Authentication:

    • Security Assertion Markup Language (SAML 2.0)

  • Requirements:

    • OneLogin

Prerequisites

Steps

Step 1: Add the Procore App to OneLogin

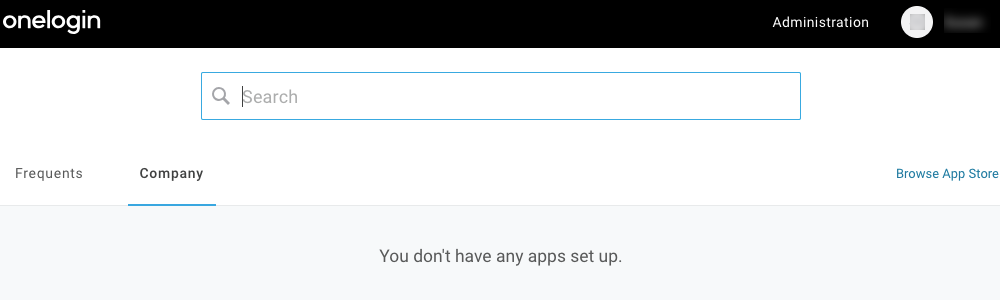
  1. Log in to your organization's OneLogin portal.
    Onelogin Admin Login

  2. Click Administration.
    Onelogin Administration

  3. Choose Apps > Add Apps to reveal the Find Applications page.
    Apps Addapps

  4. At the Find Applications page, type: Procore to locate the app
    Find Procore

  5. Click the Procore app to open the Configuration page.
    Save App Config

  6. Verify the following:

    • Display Name. Verify that the entry reads "Procore".

    • Visible in Portal. A GREEN checkmark should appear.

    • Rectangular Icon. The Procore logo should appear.

    • Square Icon. The Procore icon should appear.

  7. Click Save.

A success banner confirms the action. A row of tabs appears in your apps new page.

Step 2: Copy the Certificate

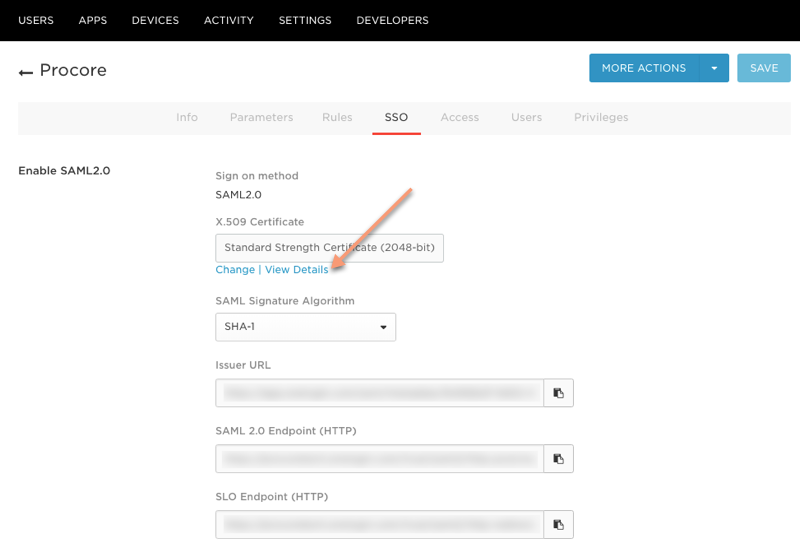
  1. In the new app's page, click the SSO tab. Later, you will copy settings from this tab to Company Admin tool in Procore later.

  2. In the X.509 Certificate box, click View Details.
    Onelogin View Details

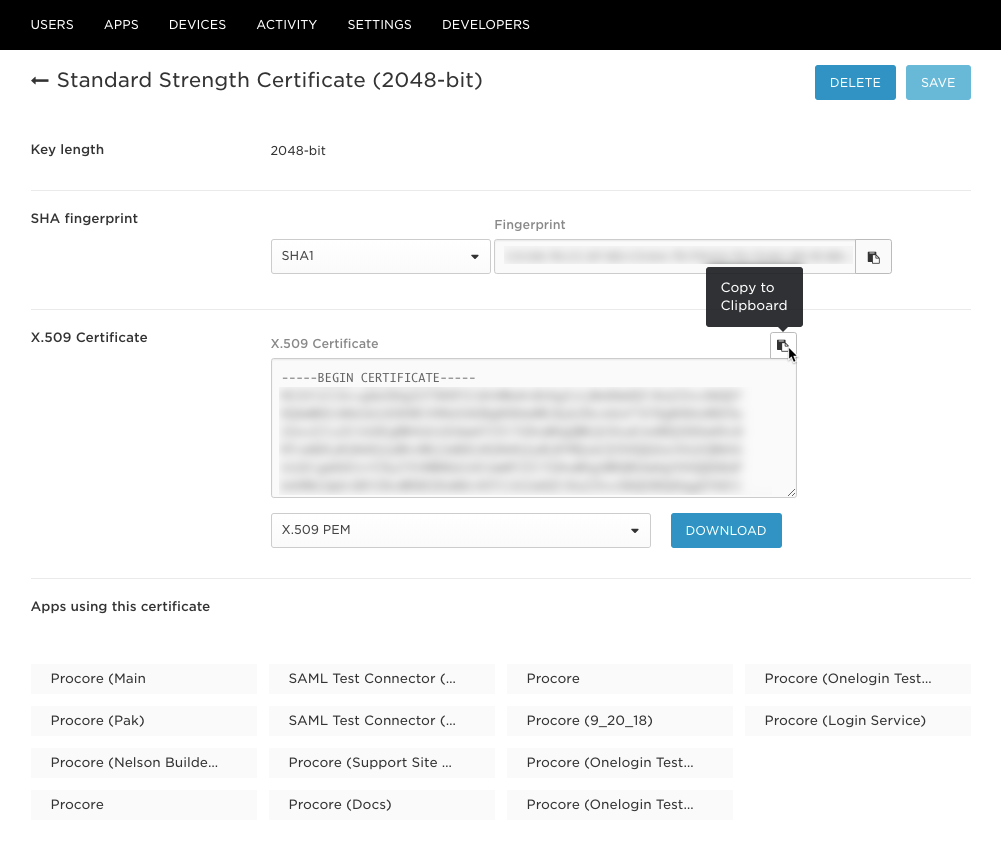
  3. In the top-right corner, click Copy to Clipboard. A 'Copied' confirmation tool tip appears if your browser supports it.
    Onelogin Copy To Clipboard

    Tip

    Copy action not successful? If your browser does not support the one-click copy function, manually highlight the text in the field and copy it (for example, press Ctrl+C on Windows or Cmd+C on Mac). You can paste the content into a plain-text editor (such as Notepad or TextEdit) to verify it copied completely.


Step 3: Format the Certificate

  1. Open a new browser tab.

  2. Navigate to the OneLogin SAML tool at: https://www.samltool.com/format%5Fx509cert.php

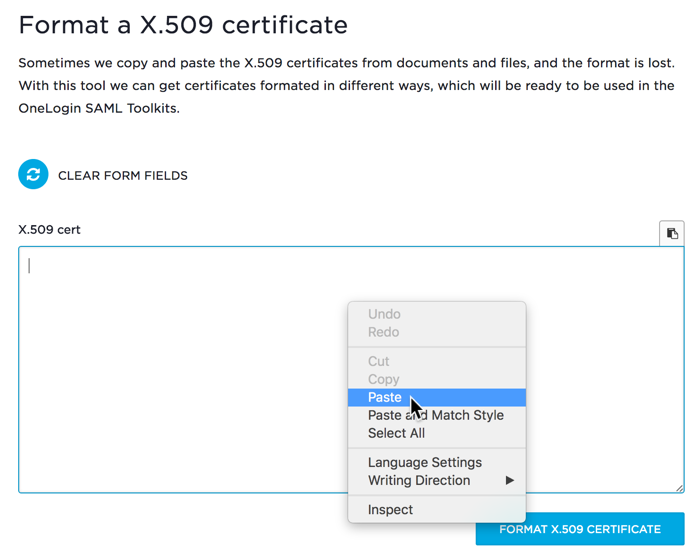
  3. In the X.509 Cert field, past the certificate you just copied.
    Paste X509 Cert

  4. Click Format X.509 Certificate.

  5. Scroll down to X.509 Cert in String Format box.

  6. In the top-right corner of the boc, click the Copy to Clipboard icon.
    X509 Cert In String Format

Step 4: Add OneLogin SSO Settings to Procore

  1. Log into the Procore web application.

  2. Navigate to the Company level Admin tool.

  3. Under Administrative Settings, click Single Sign On Configuration.

  4. Paste the OneLogin SSO values into the corresponding Procore fields:

  5. Scroll to the bottom of the page and click Save Changes.

  6. Contact your company;s Procore point of contact or Procore Support to configure your authentication domains. Procore must enter these domain names on your behalf.

  7. After Procore confirms the domains are added, complete the setup:

    1. Select the Enable Single Sign On checkbox.

    2. Select Allow Password Login to support IdP-initiated authentication.

    3. Click Save.

Authentication via the configured SSO method will become active immediately after saving the final completed configuration.

Next Step

See Also

Loading related articles...