Configure IdP-Initiated SSO for Procore with Okta
If your company manages your users with Okta, you can leverage its SSO capabilities. This gives your end users the ability to authenticate their identify for the Procore application using their Okta account. With this SSO integration, you can:
Leverage Okta for SSO access to Procore.
Simplify your entire organization's password management process.
Avoid problematic user password management.
Things to Consider
Authentication Protocol:
You can integrate the Procore application with Okta using the Security Assertion Markup Language (SAML 2.0).
Requirements:
Okta
Required Permissions:
Super Administrator rights to Okta.
'Admin' level permissions to the Company Admin tool.
Steps
Step 1: Add the Procore Application to Okta
Log in to Okta as an Administrator.
Click Admin.

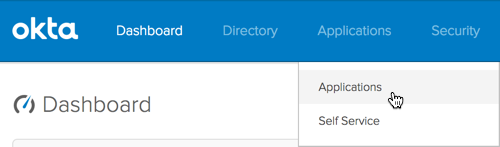
Choose Applications > Applications.
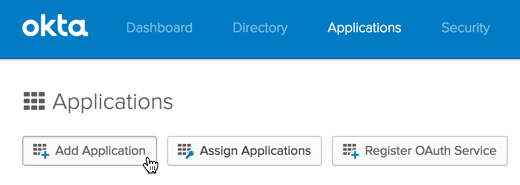
Click Add Application.
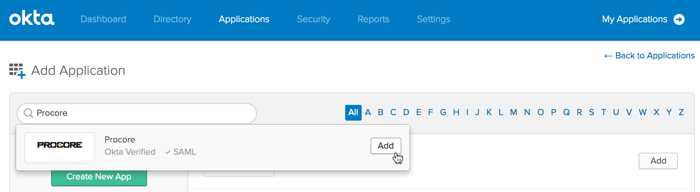
In the Search for an Application box, search for Procore. When Procore's Okta-Verified SAML app appears, click Add.
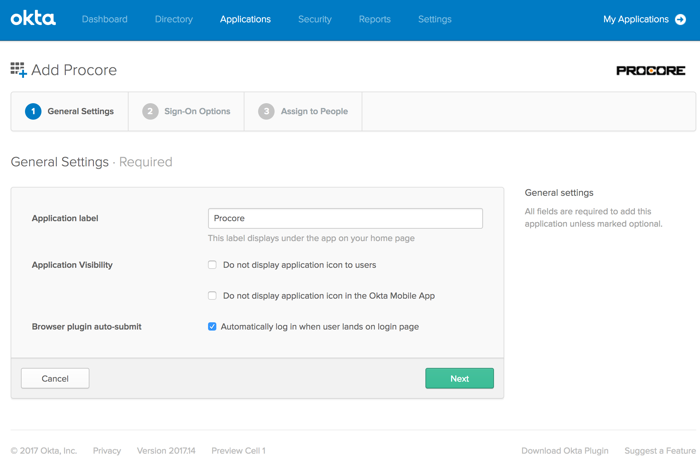
Under General Settings, do the following:
Application Label. Type a name for the new application. For example, type: Procore
Application Visibility. Leave both of these checkboxes blank. This will allow the Procore icon to appear in Okta and on the Okta login page. If you place a checkmark in this box, the logo with NOT appear.
Browser Plugin Auto-Submit. Ensure a checkmark appears in this box.
Click Next.
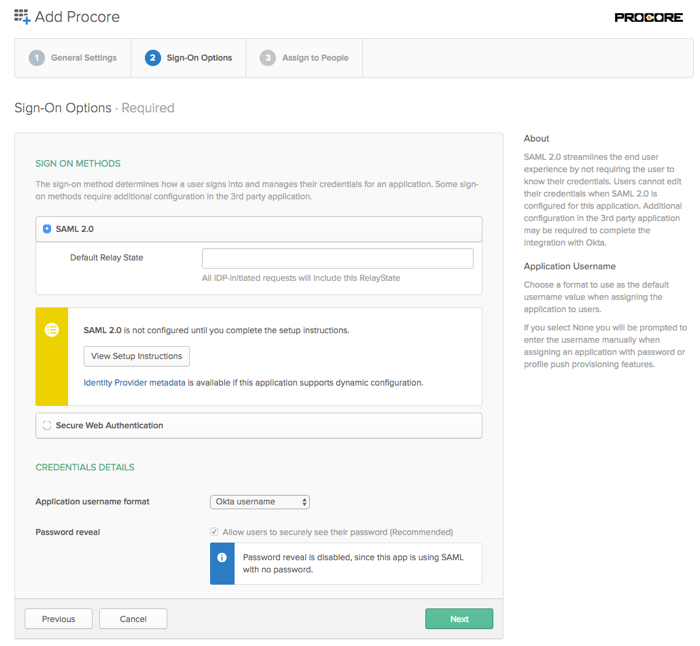
Click View Setup Instructions.
This opens the Setup SSO page in a new web browser tab. Leave this page open in your browser. Later, you will need to copy information in this page when you configure the Okta SSO settings in the Procore web application.
Important! When copying the X.509 Certificate string, do NOT copy the "------------BEGIN CERTIFICATE------------" and "------------END CERTIFICATE------------" markers. Only copy the text that resides between these markers.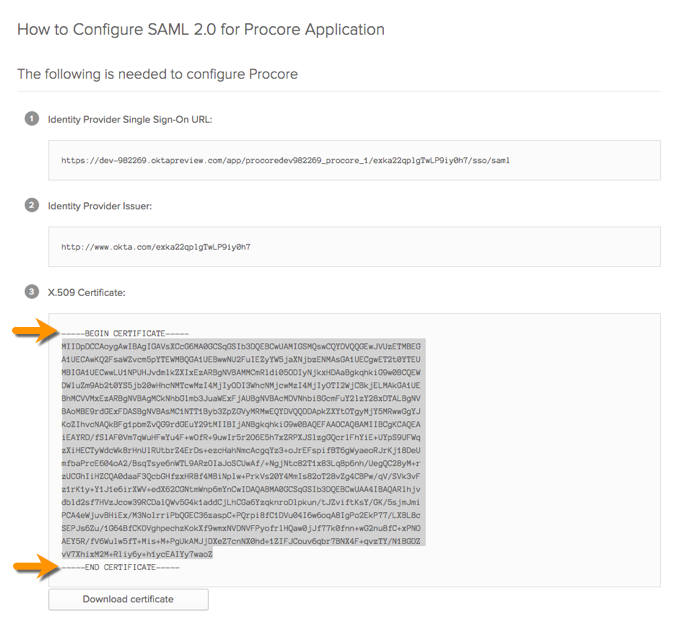
Return to your open browser tab with Okta's Sign On page, as shown below. Then ensure that Okta Username is selected in the Application Username Format list.
Click Next.
Place a checkmark next to the name of your organization's Procore users in the People list.
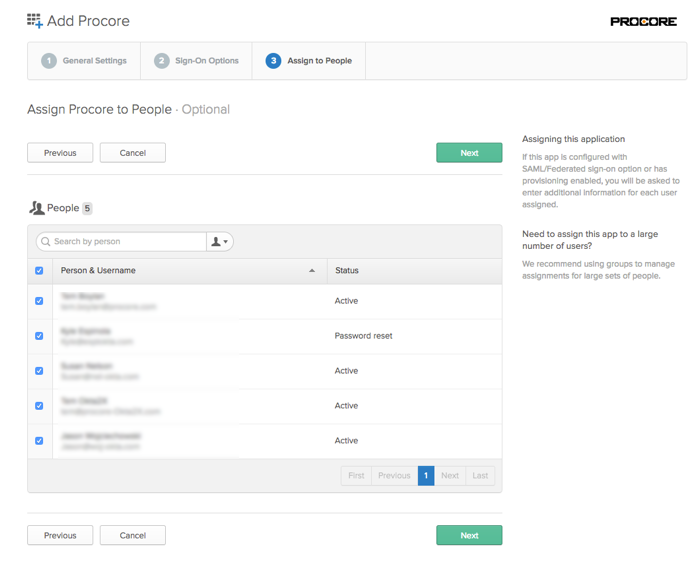
Click Next.
Verify that the attribute settings are correct for all of your Procore users. This Otka username is an email address. This is the address that you Procore users will use to log in to your Procore + Okta SSO Integration.
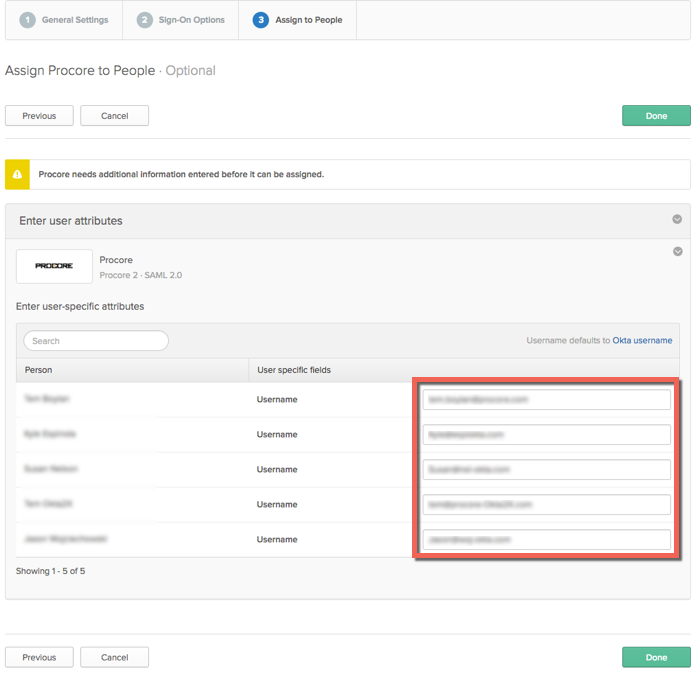
Click Done.
Continue with the next procedure.
Step 2: Configure the Okta Settings in Procore
Login into the Procore web application.
Note: You must log in using an account that has 'Admin' permission to the company's Admin tool.Navigate to the company's Admin tool.
Under Administrative Settings, click Single Sign On Configuration.
Enter the following information:
Single Sign On Issuer URL
Paste the 'Identity Provider Single Sign-On URL' that you copied from Okta into this field.Single Sign On Target URL.
Leave this field blank.Single Sign On x509
Paste the 'X509 Certificate' that you copied from Okta into this field.
Important: When copying the certificate information from Okta, do NOT copy the "------------BEGIN CERTIFICATE------------" and "------------END CERTIFICATE------------" markers. You only want to copy the text that resides between these markers.
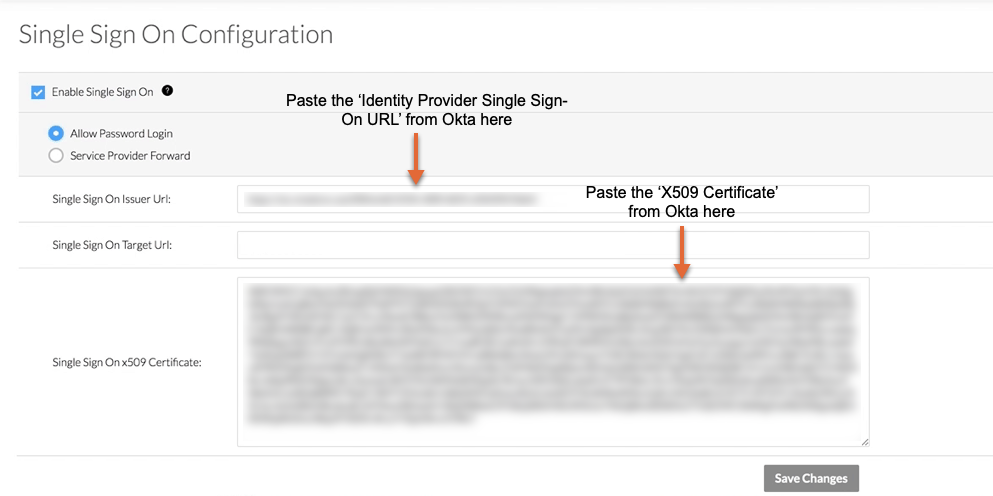
Click Save Changes.
Next, reach out to your company's Procore point of contact or contact Procore Support to request that they enter the domains you want to target for authentication via SSO. Procore must enter these domains on your behalf.
Once the domain(s) have been entered by Procore, take the final steps to enable SSO for your company:
Mark the Enable Single Sign On box in Procore's SSO configuration settings.
Select Allow Password Login to enable an IdP-initiated flow.
Click Save.
Authentication via the configured SSO method will become active immediately after saving the final completed configuration.
Customers who license Procore Pay may require additional support enabling MFA for Payments when SSO is configured for their company. If you license Procore Pay and want to enable SSO, contact Support.