Configure Advanced Settings: Project Level Inspections
Things to Consider
Prerequisites
Add the Inspections tool to the project. See Add and Remove Project Tools.
Steps
Configure the Inspection Tool's Settings
Manage Inspection Templates
View and Retrieve Deleted Inspection Templates
Configure the Inspections Tool's Settings
Navigate to the Project level Inspections tool.
Click the Configure Settings
 icon.
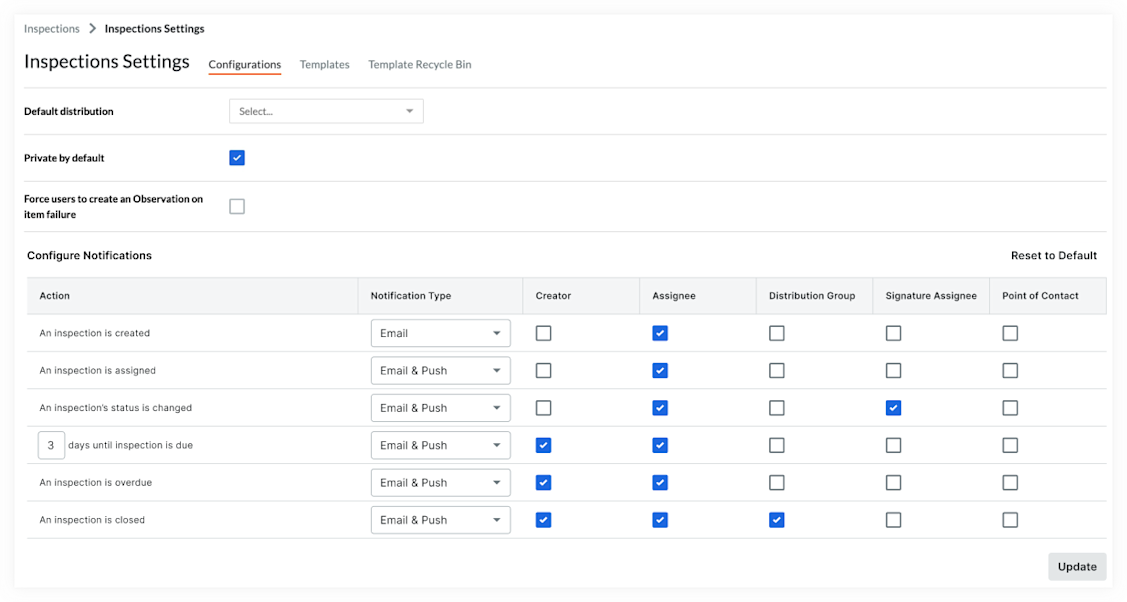
icon.Click Configurations.
Default distribution: Click the Select drop-down menu and select one or more users to add them as default members of each inspection's distribution list.
Private by default: Mark this checkbox if you would like all inspections created to be private by default. This means that only 'Admin' users, members of the distribution list, and users designated as 'Assignee(s)' will have access to the inspection.
Configure Notifications: Choose who will receive an email or push notification when an action or event occurs in the Inspections tool. Note: To reset notifications to the default configuration, click 'Reset to Default'.
Click Update to save your notification settings.
Manage Inspection Templates
Navigate to the Project level Inspections tool.
Click the Configure Settings
icon.Click Templates.
Add or delete Company level inspection templates to or from your project.
Manage Project level inspection templates.
View and Retrieve Deleted Inspection Templates
Navigate to the Project level Inspections tool.
Click the Configure Settings
icon.Click Template Recycle Bin.
Click View on the template you want to view or retrieve.
If you want to retrieve the template from the Recycle Bin, click Retrieve.
See Also
Loading related articles...