Navigate to the project's Document Management tool.
Click the Configure Settings  icon.
icon.
Click the Permissions tab.
Click the arrow  icon next to 'Document Permissions' to expand the section.
View Document Permissions
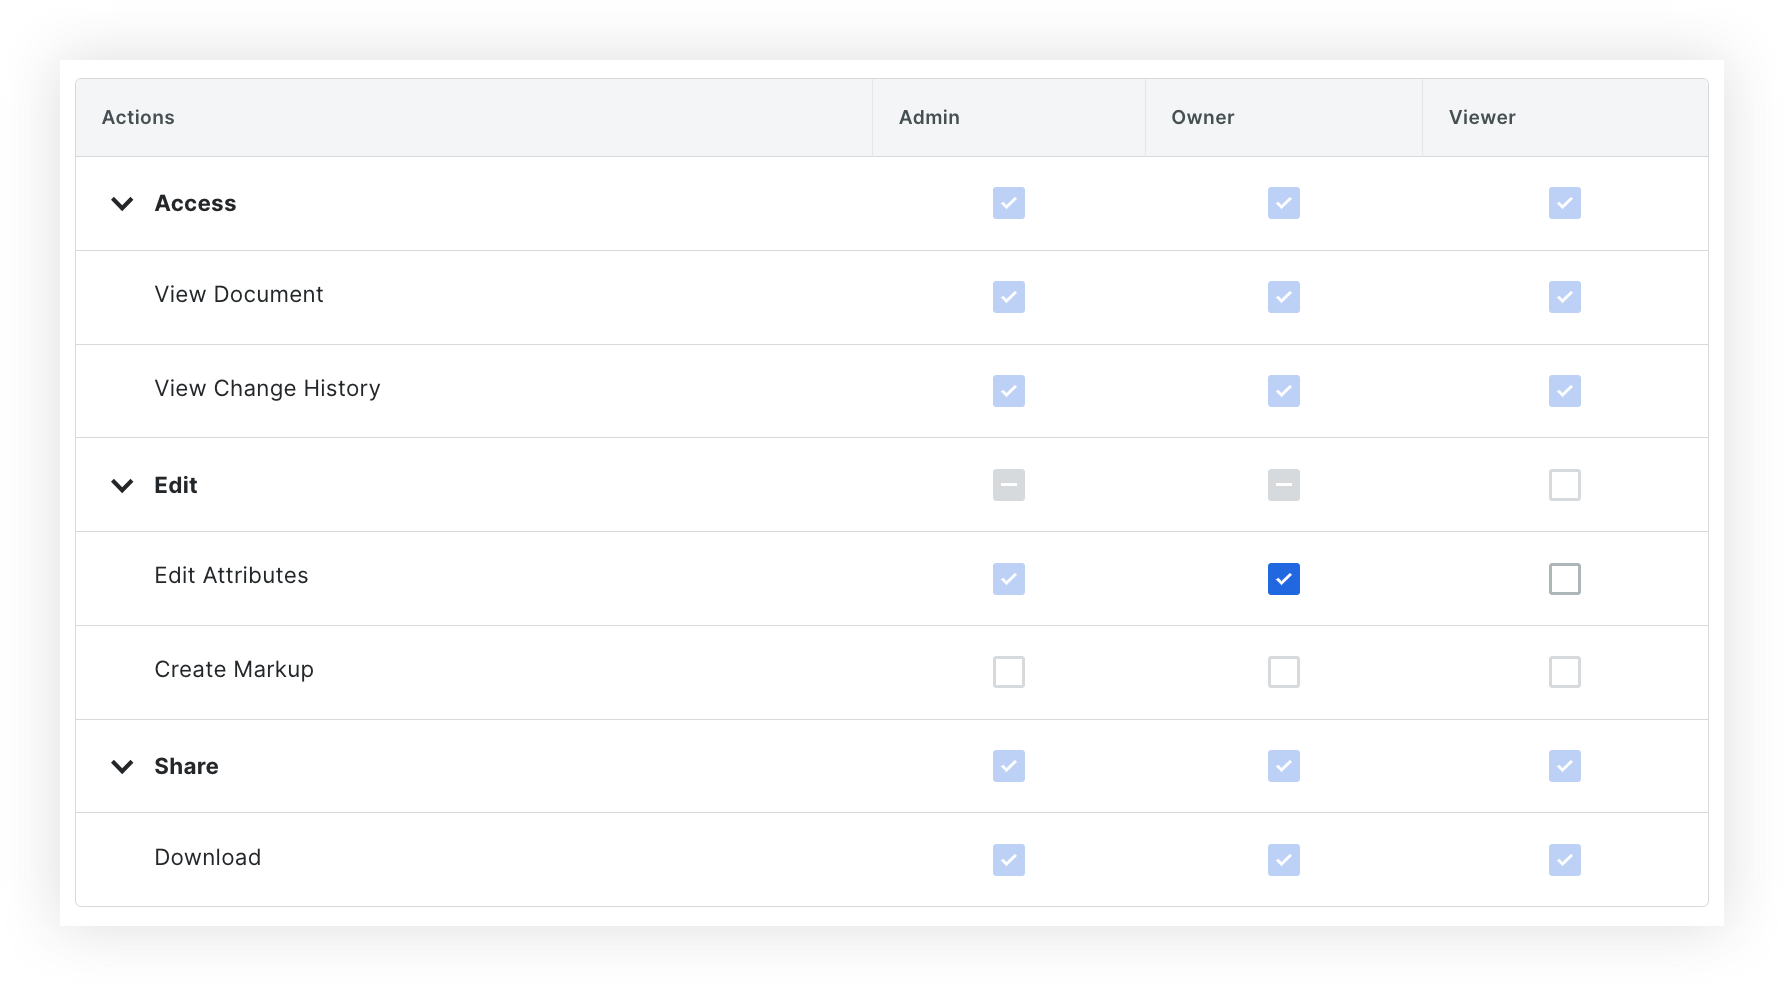
The table uses a checkmark  icon to show which actions the 'Admin', 'Owner', and 'Viewer' permission levels can take.
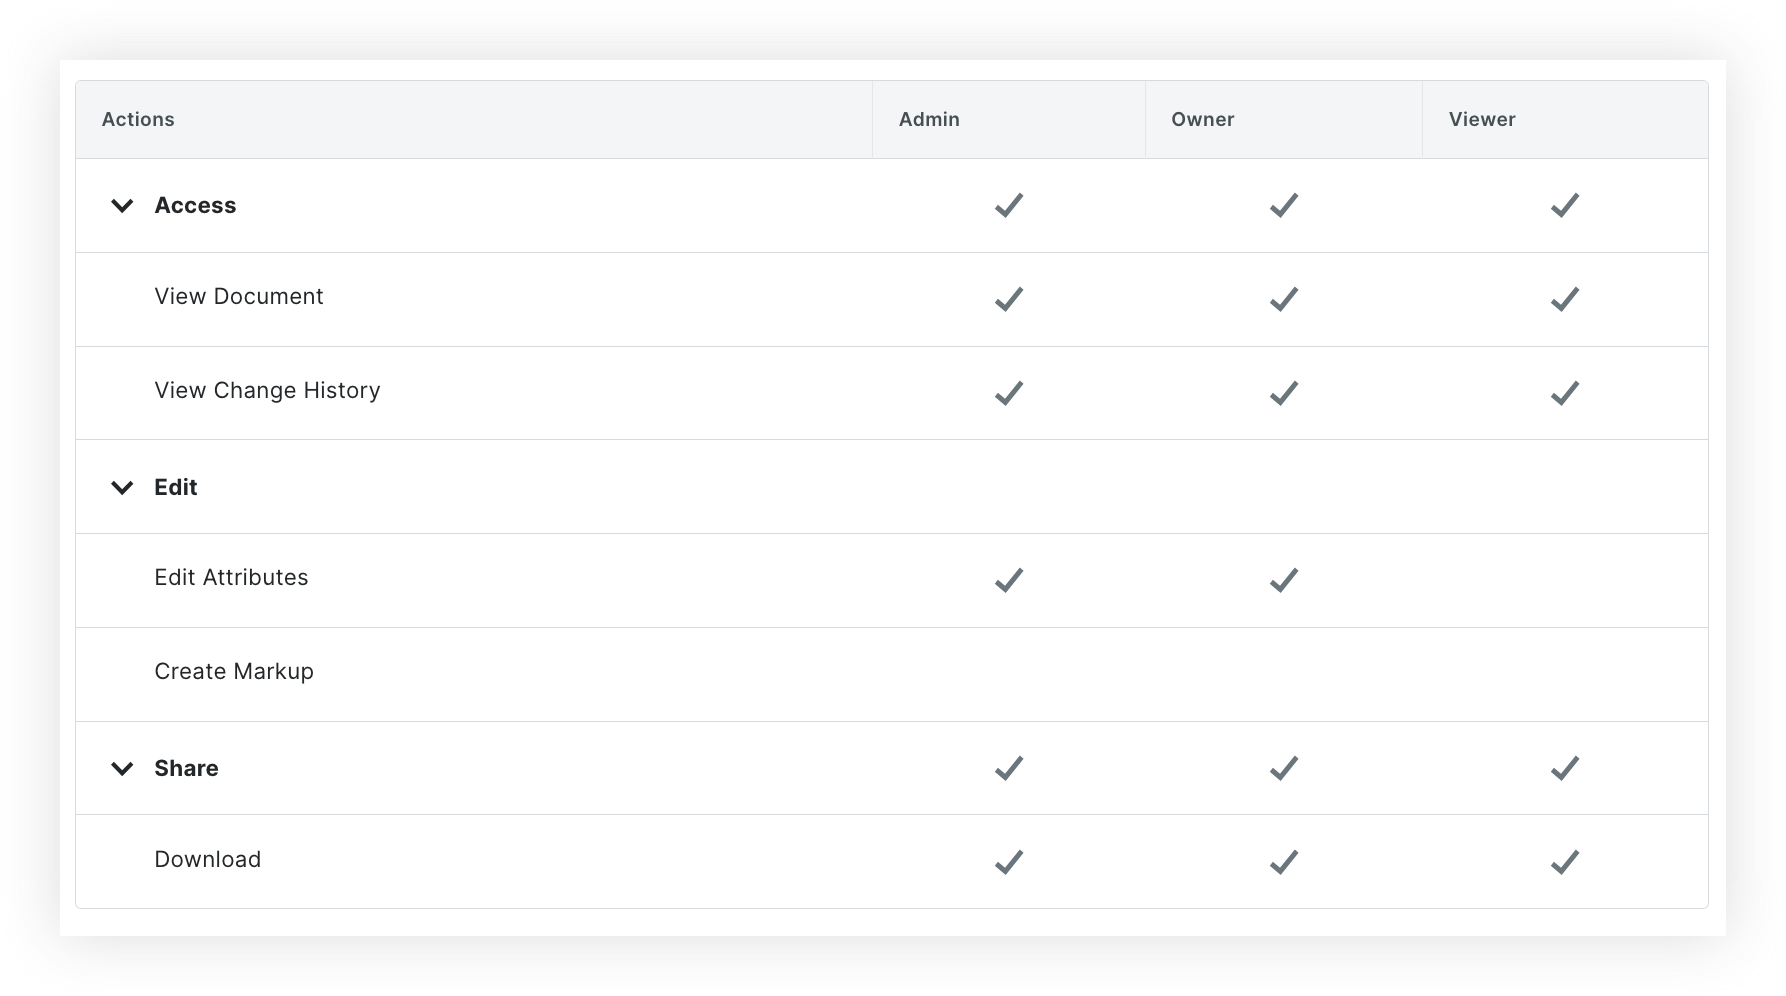
By default, the following actions can be taken by these roles:
Admin
View Documents
View Change History
Edit Attributes
Share Documents
Download Documents
Owner
View Documents
View Change History
Edit Attributes
Share Documents
Download Documents
Viewer
View Documents
Share Documents
Download Documents
Edit Document Permissions
In the 'Document Permissions' section, click Edit.
Make changes to the permissions as necessary:
Note: Actions that can't be customized are unavailable to click.
When you are done making changes, click Save.
Now that you have the three permission levels set up, you can use permission groups to assign or remove additional permissions (such as the ability to upload and submit files). See Create a Permission Group for the Document Management Tool. This is also where you can manage each groups's access to documents based on document attributes.