Scheduled maintenance on internal systems used for Customer Support interactions will take place on Friday, 13 November 2026 at 4:00 PM PST through Sunday, 15 November 2026 at 2:00 PM PST (Saturday, 14 November 2026 at 00:00 UTC through Sunday, 15 November 2026 at 22:00 UTC).
Customer Support will be unavailable during this window, with normal operations resuming immediately following the completion of the work. Responses to requests submitted during the downtime will experience delays, and this status page will be updated once the maintenance concludes. For urgent support inquiries please reach out to your Procore Point of Contact.
Welcome to our new support center!
Here, you will find answers to all your questions about Procore products and features—more easily than ever before. This is now the only support site for Procore. The previous site (support.procore.com) is now obsolete and will no longer be updated.
Understanding Single Sign-On (SSO) terminology is key to configuring your integration correctly. Depending on your organization's setup, users can either log in via the Procore login page (SP-initiated SSO) or by clicking a tile in your corporate dashboard (IdP-initiated SSO).
To learn some key SSO terms Show/Hide Details
Term
SP-Initiated Context
IdP-Initiated Context
Identity Provider (IdP)
Authenticates the user after receiving a request from Procore.
Authenticates the user directly within the IdP portal and initiates the session.
Service Provider (SP)
Procore—initiates the login request and consumes the returned assertion.
Procore—receives and validates the unsolicited assertion from the IdP.
Issuer URL (Entity ID)
Identifies Procore as the entity requesting authentication.
Identifies your IdP as the entity issuing the authentication assertion.
Target URL
The IdP endpoint where Procore sends the SAML AuthnRequest.
The IdP app tile/launch URL that routes the user directly to Procore.
SAML
Protocol used to pass requests to the IdP and assertions back to Procore.
Protocol used to push pre-generated authentication assertions directly to Procore.
X.509 Certificate
Verifies signatures on both outgoing requests and incoming assertions.
Verifies the IdP's digital signature on the incoming authentication assertion.
If your company uses Microsoft Entra ID to manage user logins to Procore, support is available for both Single Sign-On (SSO) authentication flows:
Authentication Flow
How It Works
Configuration
SP-Initiated SSO
Users navigate to the Procore login page, which redirects to Microsoft Entra ID for authentication before granting access.
Follow the Steps below.
IdP-Initiated SSO
Users log into their Microsoft Entra ID portal and launch Procore directly by clicking the application tile.
A user's Microsoft Entra ID primary email address must match their Procore login email address. To update a primary email address or alias to match Procore, follow the Microsoft documentation to Change a user name and email address.
Step 1: Add Procore as a New Enterprise Application in Entra ID
Under Add from the Gallery, type the following in the Enter a Name box: Procore.
Click the matching application named Procore. This reveals a new pane.
In the Name box, type a name for your application. Note: In the example above, we named our application: Procore (Demo)
Click Add. A message appears to confirm that the application was added successfully. You should now be viewing your new Procore enterprise application's Overview page.
Step 2: Configure the Procore Enterprise Application's SSO Settings
In the Overview page for your new enterprise application, under Manage, click Single Sign-On.
In the Single Sign-on Mode page, click SAML. This opens the Set Up Single Sign-On with SAML - Preview page.
Under Basic SAML Configuration, click Edit. This opens the Basic SAML Configuration window.
Under the Basic SAML Configuration page, do the following:
Identifier (Entity ID) Change the value from: <https://app.procore.com> to: <https://login.procore.com> Note: If you are using Portfolio Financials and Capital Planning, enter the following value instead:[https://www.honestbuildings.com/pfcp/app/#!/login](https://login.procore.com "https://login.procore.com")
Tip: When to use 'Enable Unique Entity ID' in Procore
Single Instance: If your company only manages one (1) Procore company instance, clear the Enable Unique Entity ID check box.
Multiple Instances: If your company manages multiple Procore company instances and requires a dedicated enterprise application for each instance in your IdP, mark the Enable Unique Entity ID check box. Note that each Procore instance is still limited to one (1) enterprise application.
Important Requirements & Limitations:
Email Domain Rule: Procore targets SSO users by email domain. An email domain can only be mapped to one (1) Procore company instance across the entire platform.
Generating the URL: You must select the EnableUnique Entity ID check box on the SSO Configuration page in the Company Admin tool before the unique Single Sign On Entity ID URL will appear in Procore (the service provider). Once generated, copy and paste this URL into the IdP's Entity ID field.
Access & Provisioning: Enabling this check box does not alter company access. Access to a company instance in Procore is determined by a user's presence in the company's Directory tool and their configured tool permissions. Automated user provisioning is not currently supported.
Sign On URL Leave this field blank. You do NOT need to enter a value in this field.
Reply URL (Assertion Consumer Service URL) Enter the following: <https://login.procore.com/saml/consume>
Click Save. A message appears to confirm that your settings were saved successfully.
Click the 'x' to close the Basic SAML Configuration page.
Under SAML Signing Certificate, click the Download link for the Certificate (Base64) file. Notes:
This downloads a file named PublicCertificate.cer to your browser's specified download area.
Open the file in a text editor and leave it open on your computer. Later, you will copy the code that appears between the ---BEGIN CERTIFICATE--- and ---END CERTIFICATE-- tags into Procore.
Step 3: Add the Entra ID Settings to Procore's Company Level Admin Tool
Leave the Microsoft Entra ID page open as described in the previous step.
Log into Procore using your Procore Administrator account.
Navigate to the Company level Admin tool.
Under Company Settings, click Single Sign On Configuration.
Leave Procore's 'Single Sign On Configuration' page open.
Go to the Microsoft Entra ID page that you left open.
Under Set Up [Your Application Name], click View Step-by-Step Instructions. This opens the Configure Sign-On page.
Copy this information from Microsoft Entra ID…
Paste it into this field in Procore…
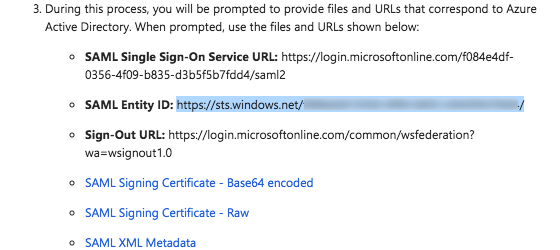
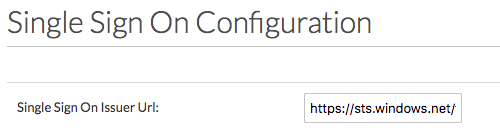
SAML Entity ID Copy the URL in this field from Microsoft Entra ID.
Single Sign On Issuer URL Paste the SAML Entity ID URL into the Single Sign On Issuer URL field.
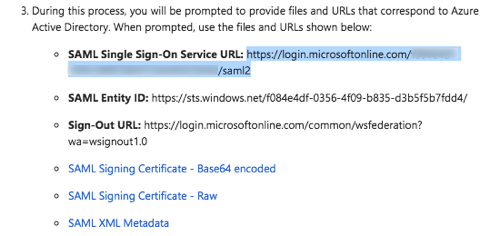
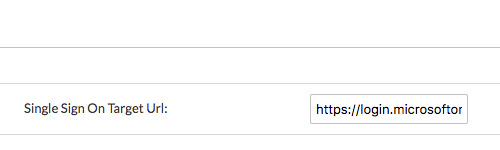
SAML Single Sign-On Service URL Copy the URL in this field from Microsoft Entra ID.
Single Sign On Target URL Paste the SAML Single Sign-On Service URL into the Single Sign On Target URL field.
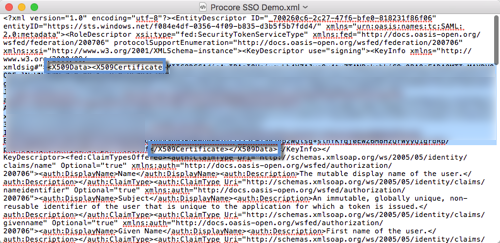
SAML XML Metadata Download this file to your computer and open it in a text editor (i.e., Notepad or Text/Edit). Locate the certificate data that appears between the HTML start and end tags for the x509 certificate. Then copy the data. Do NOT copy the tags. This is depicted in the animated image above: Start Tag:End Tag:
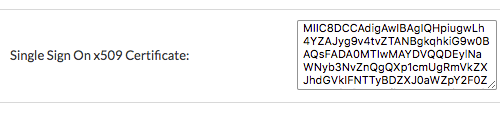
Single Sign On x509 Certificate Paste the certificate data you copied into this field.
On the 'Single Sign On Configuration' page in Procore, click Save Changes.
Reach out to Procore Support or your company's Procore point of contact to request that they configure the email domain(s) you'd like to target for SSO.
After you receive confirmation that the SSO configuration is ready, mark the Enable Single Sign On checkbox on the 'Single Sign On Configuration' page.